Configure entitlement details
Where can I see an entitlement’s details?
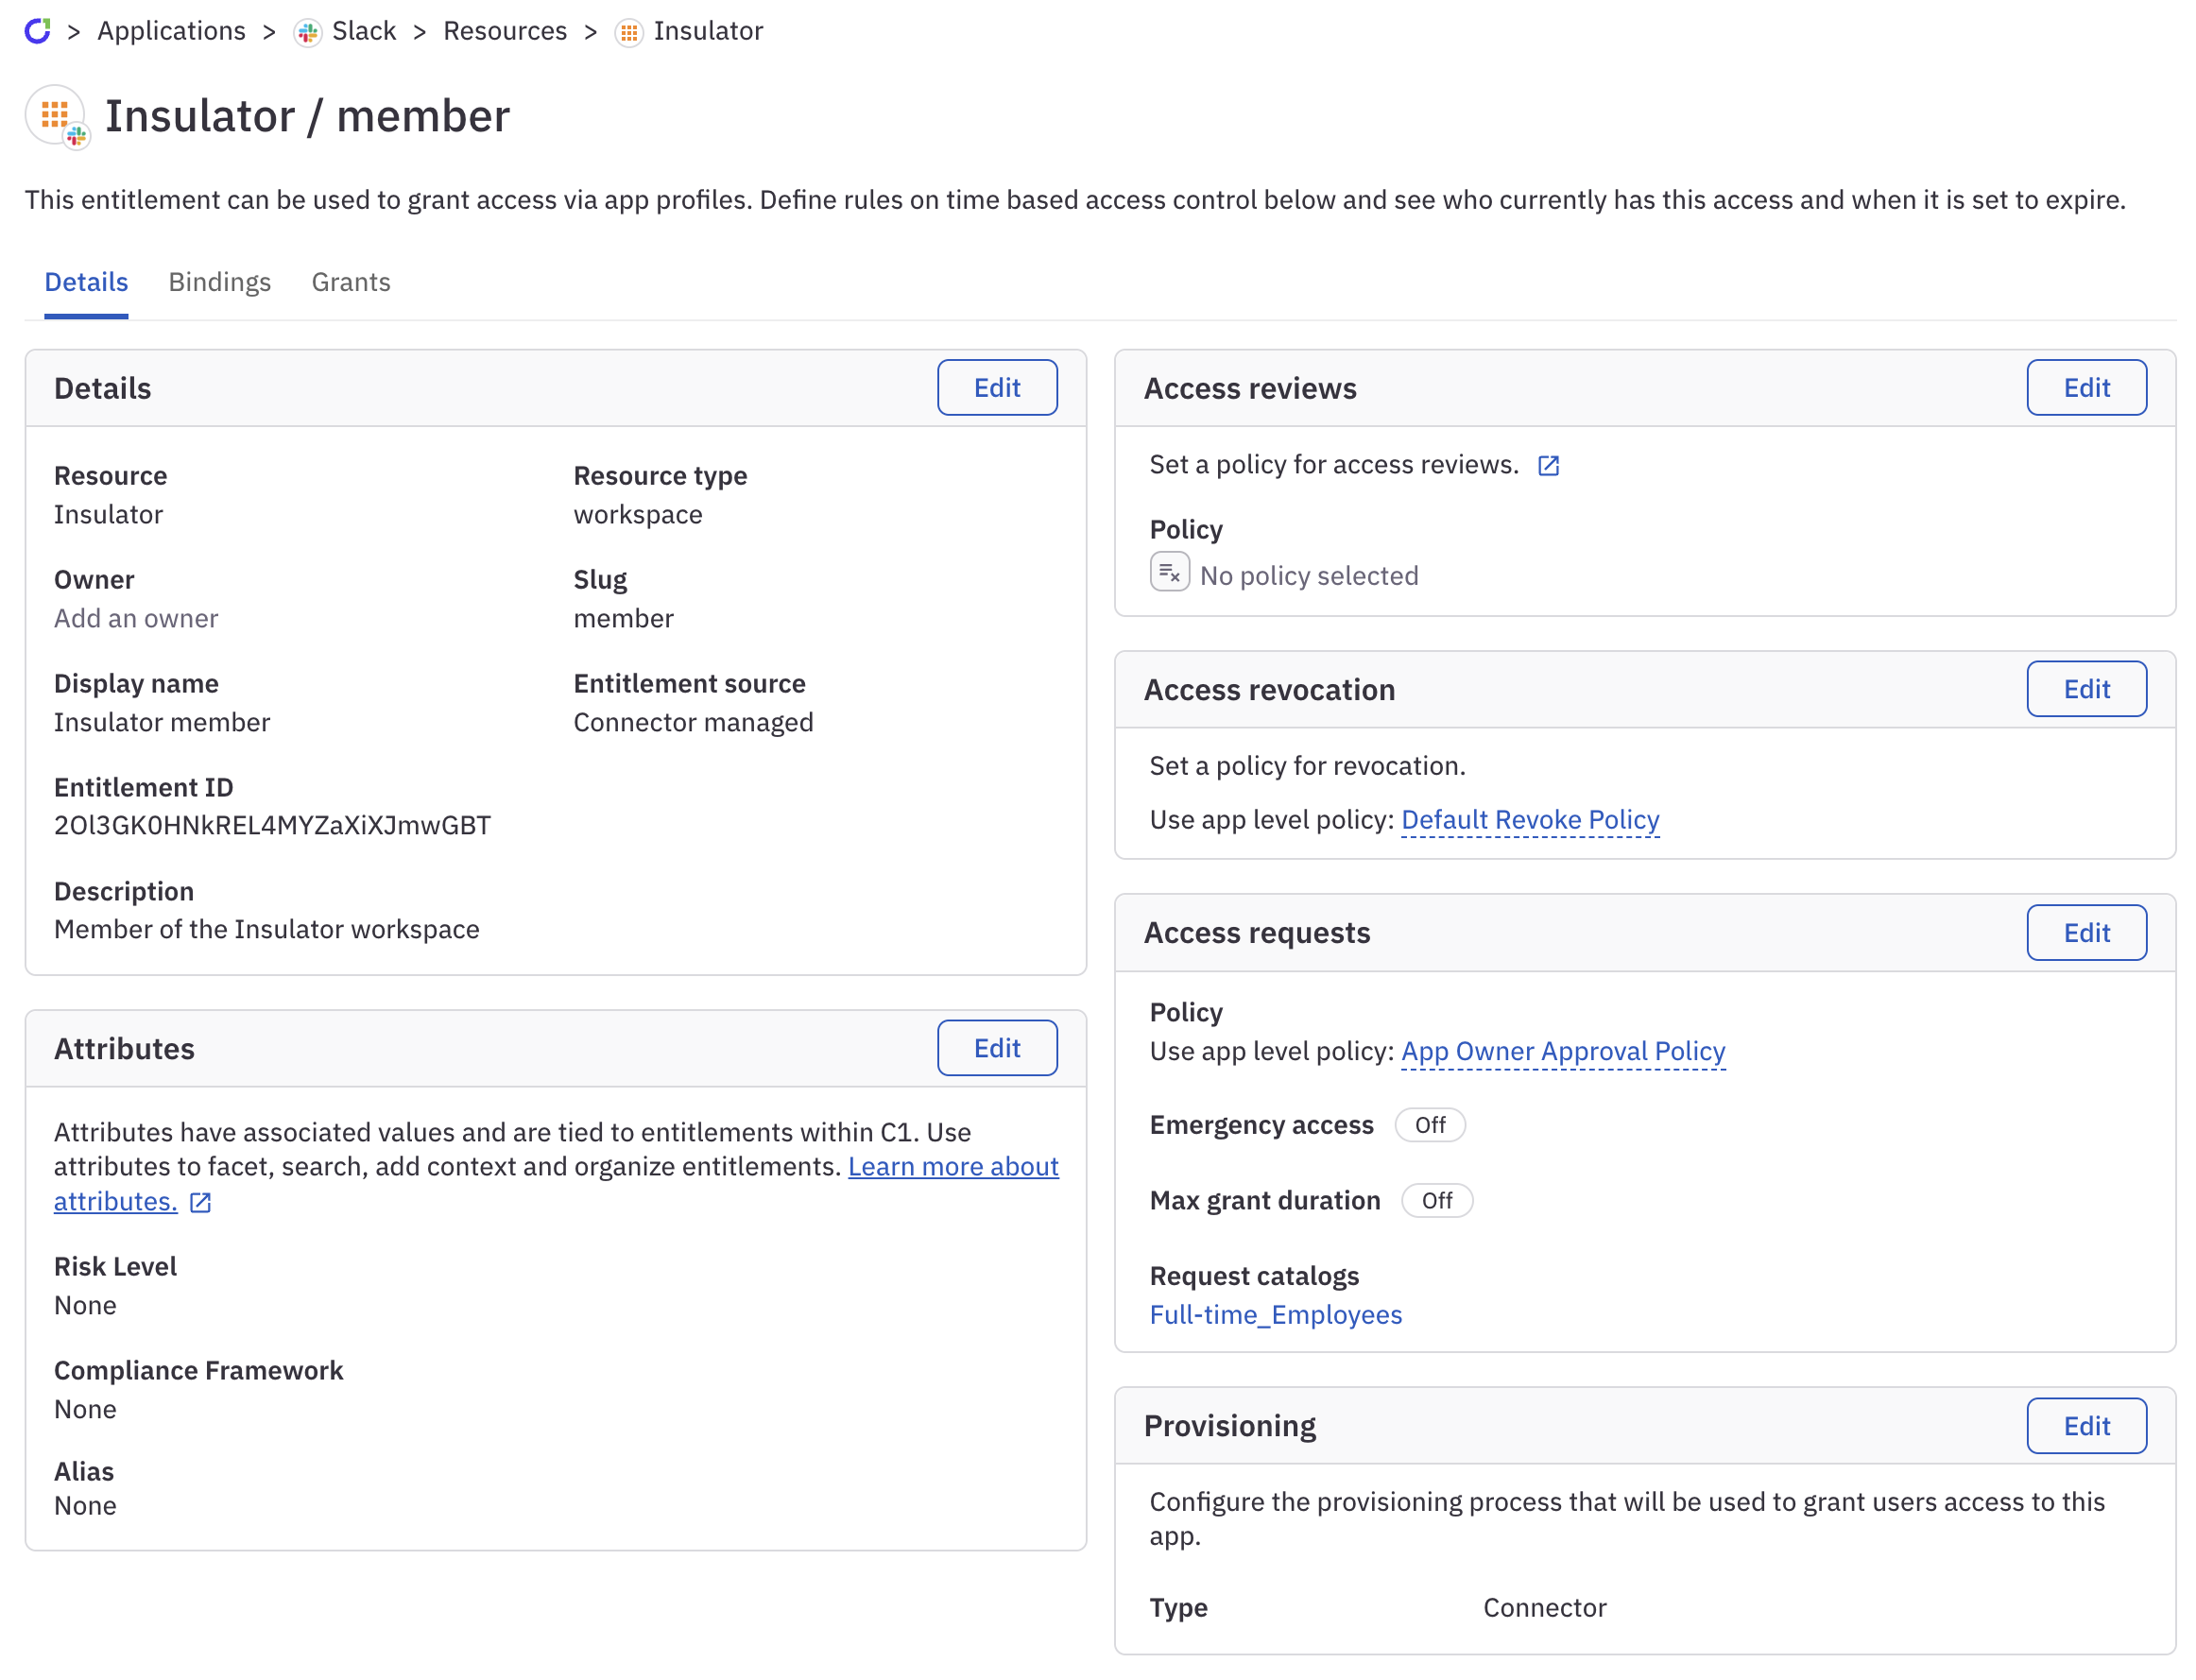
An entitlement’s details page shows the entitlement’s configuration and key settings for how it will be granted, reviewed, and revoked.
You can reach a entitlement’s details page by clicking its name on the Entitlements tab of an application’s details page, or by clicking the entitlement name on a resource’s details page.
Set an entitlement owner
Set one or more owners for the entitlement. Setting entitlement owners is optional, but doing so allows you to create policies that require the entitlement owner to review access or approve access requests.
In the navigation panel, open Apps and click Applications.
Navigate to an entitlement:
- Click the application’s name
- Click the Entitlements tab
- Locate the entitlement you want and click its name
In the Details section of the page, click Edit.
Use the Owner dropdown to select one or more owners for the entitlement.
Click Save.
The entitlement owners are now set, and you can update them at any time.
Change the entitlement’s description
Entitlement descriptions are shown in the entitlement details pane, which pops up when you click on an entitlement name. Adding a custom description helps users to gain context about the entitlement when they are doing tasks like requesting access, completing access reviews, or investigating the contents of a request catalog.
In the navigation panel, open Apps and click Applications.
Navigate to an entitlement:
- Click the application’s name
- Click the Entitlements tab
- Locate the entitlement you want and click its name
In the Details section of the page, click Edit.
Enter a new description in the Description field.
Click Save.
The entitlement’s description is now updated throughout ConductorOne, including in the Slack app.
Change the entitlement’s slug and display name
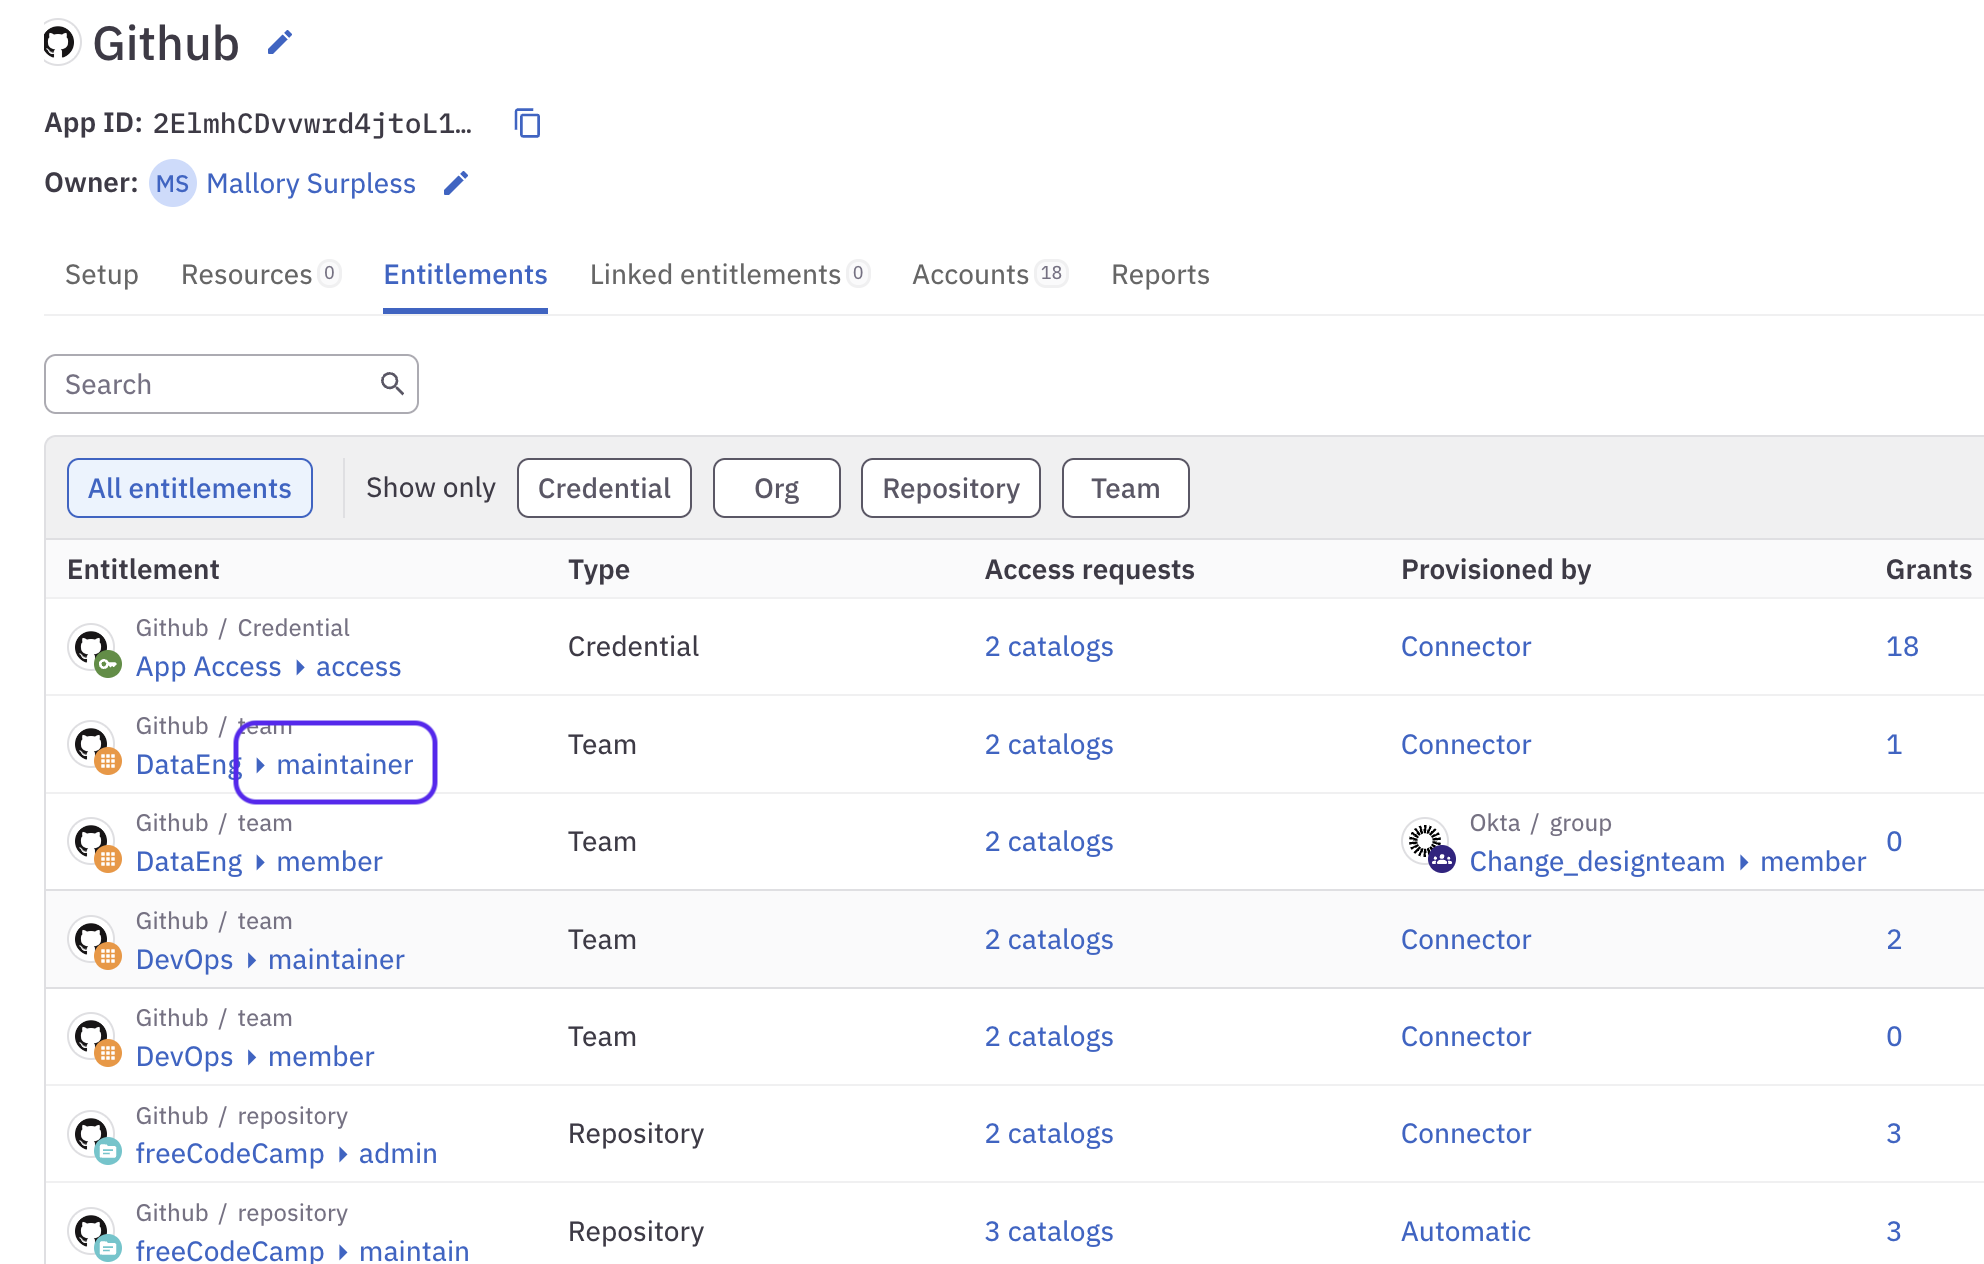
In ConductorOne we call attention to entitlements by placing an oval shape around them. This creates what we call a slug. The entitlement slug gets special treatment because it’s the most important part of an entitlement summary. The word or words inside that oval tell you exactly what permission the entitlement grants.
Entitlement slugs show up on individual entitlement summaries:
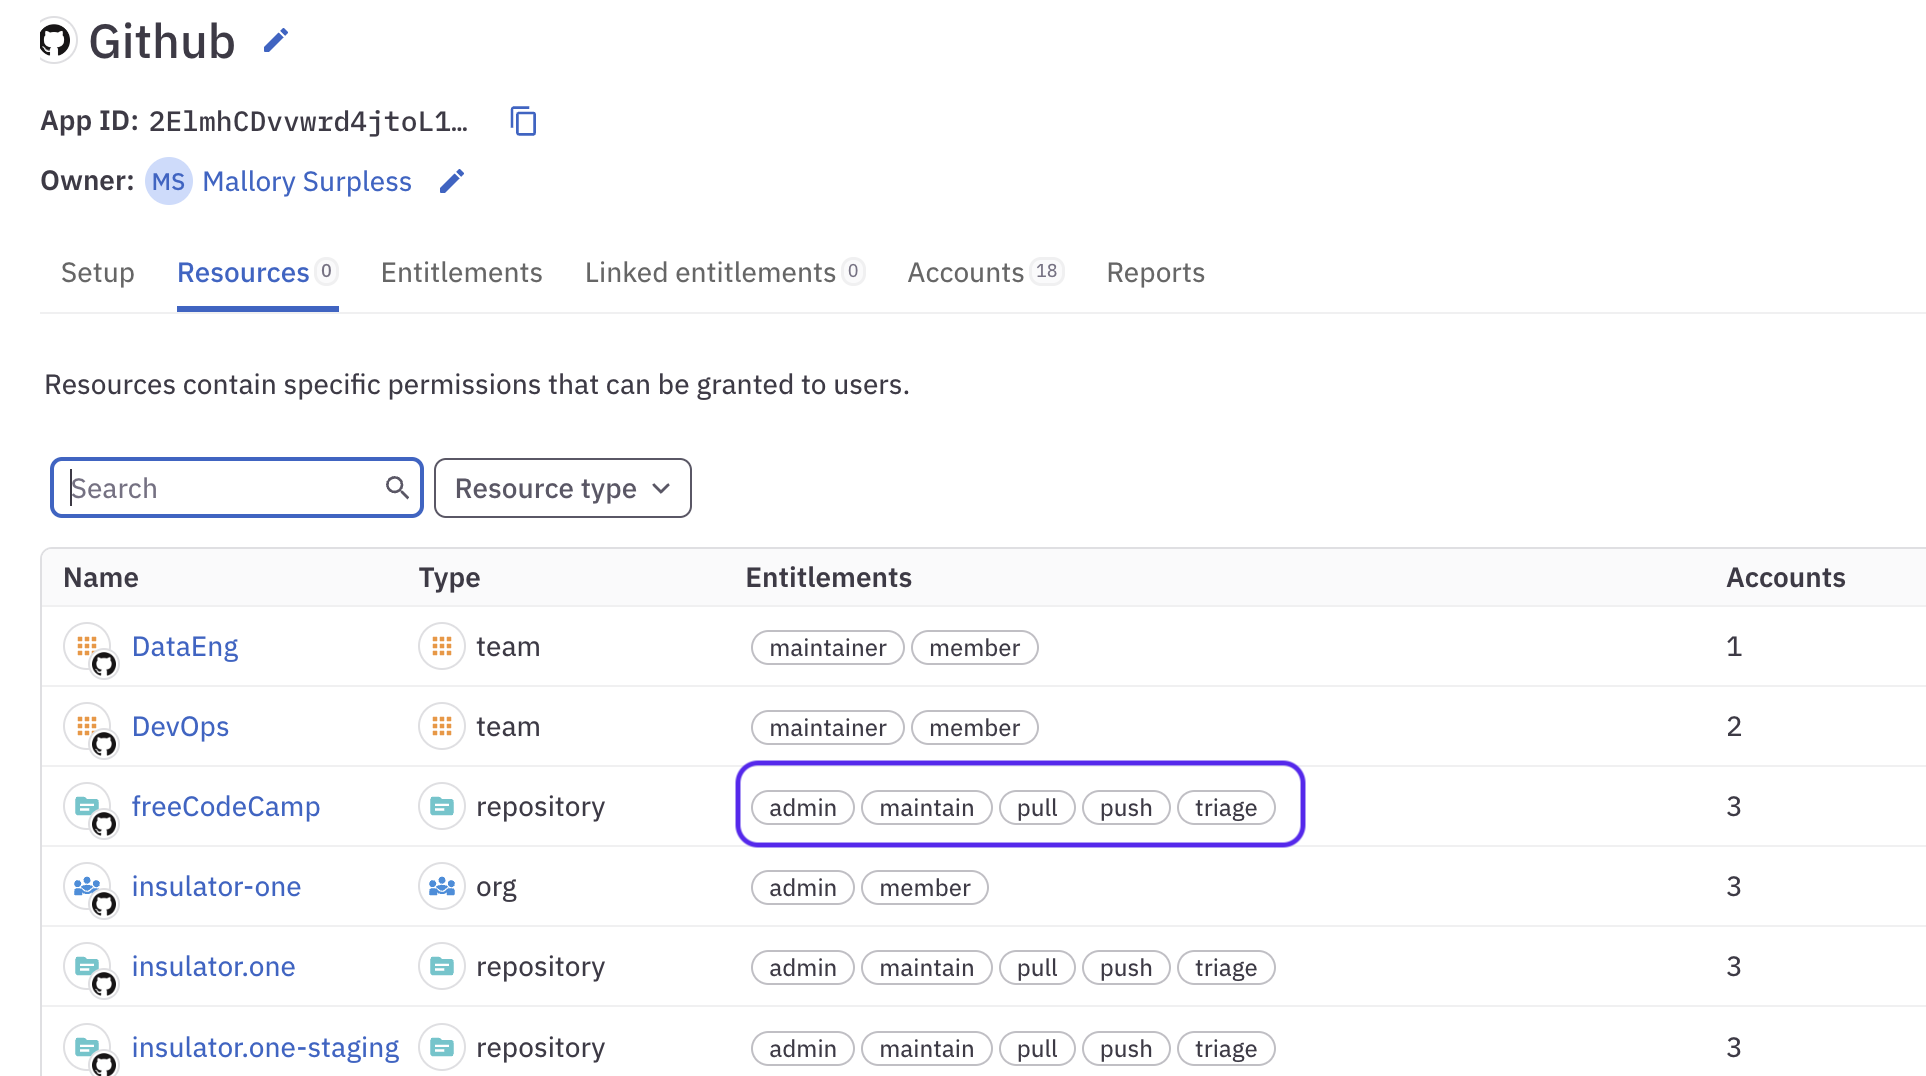
And are used to show all the entitlements on a particular resource:
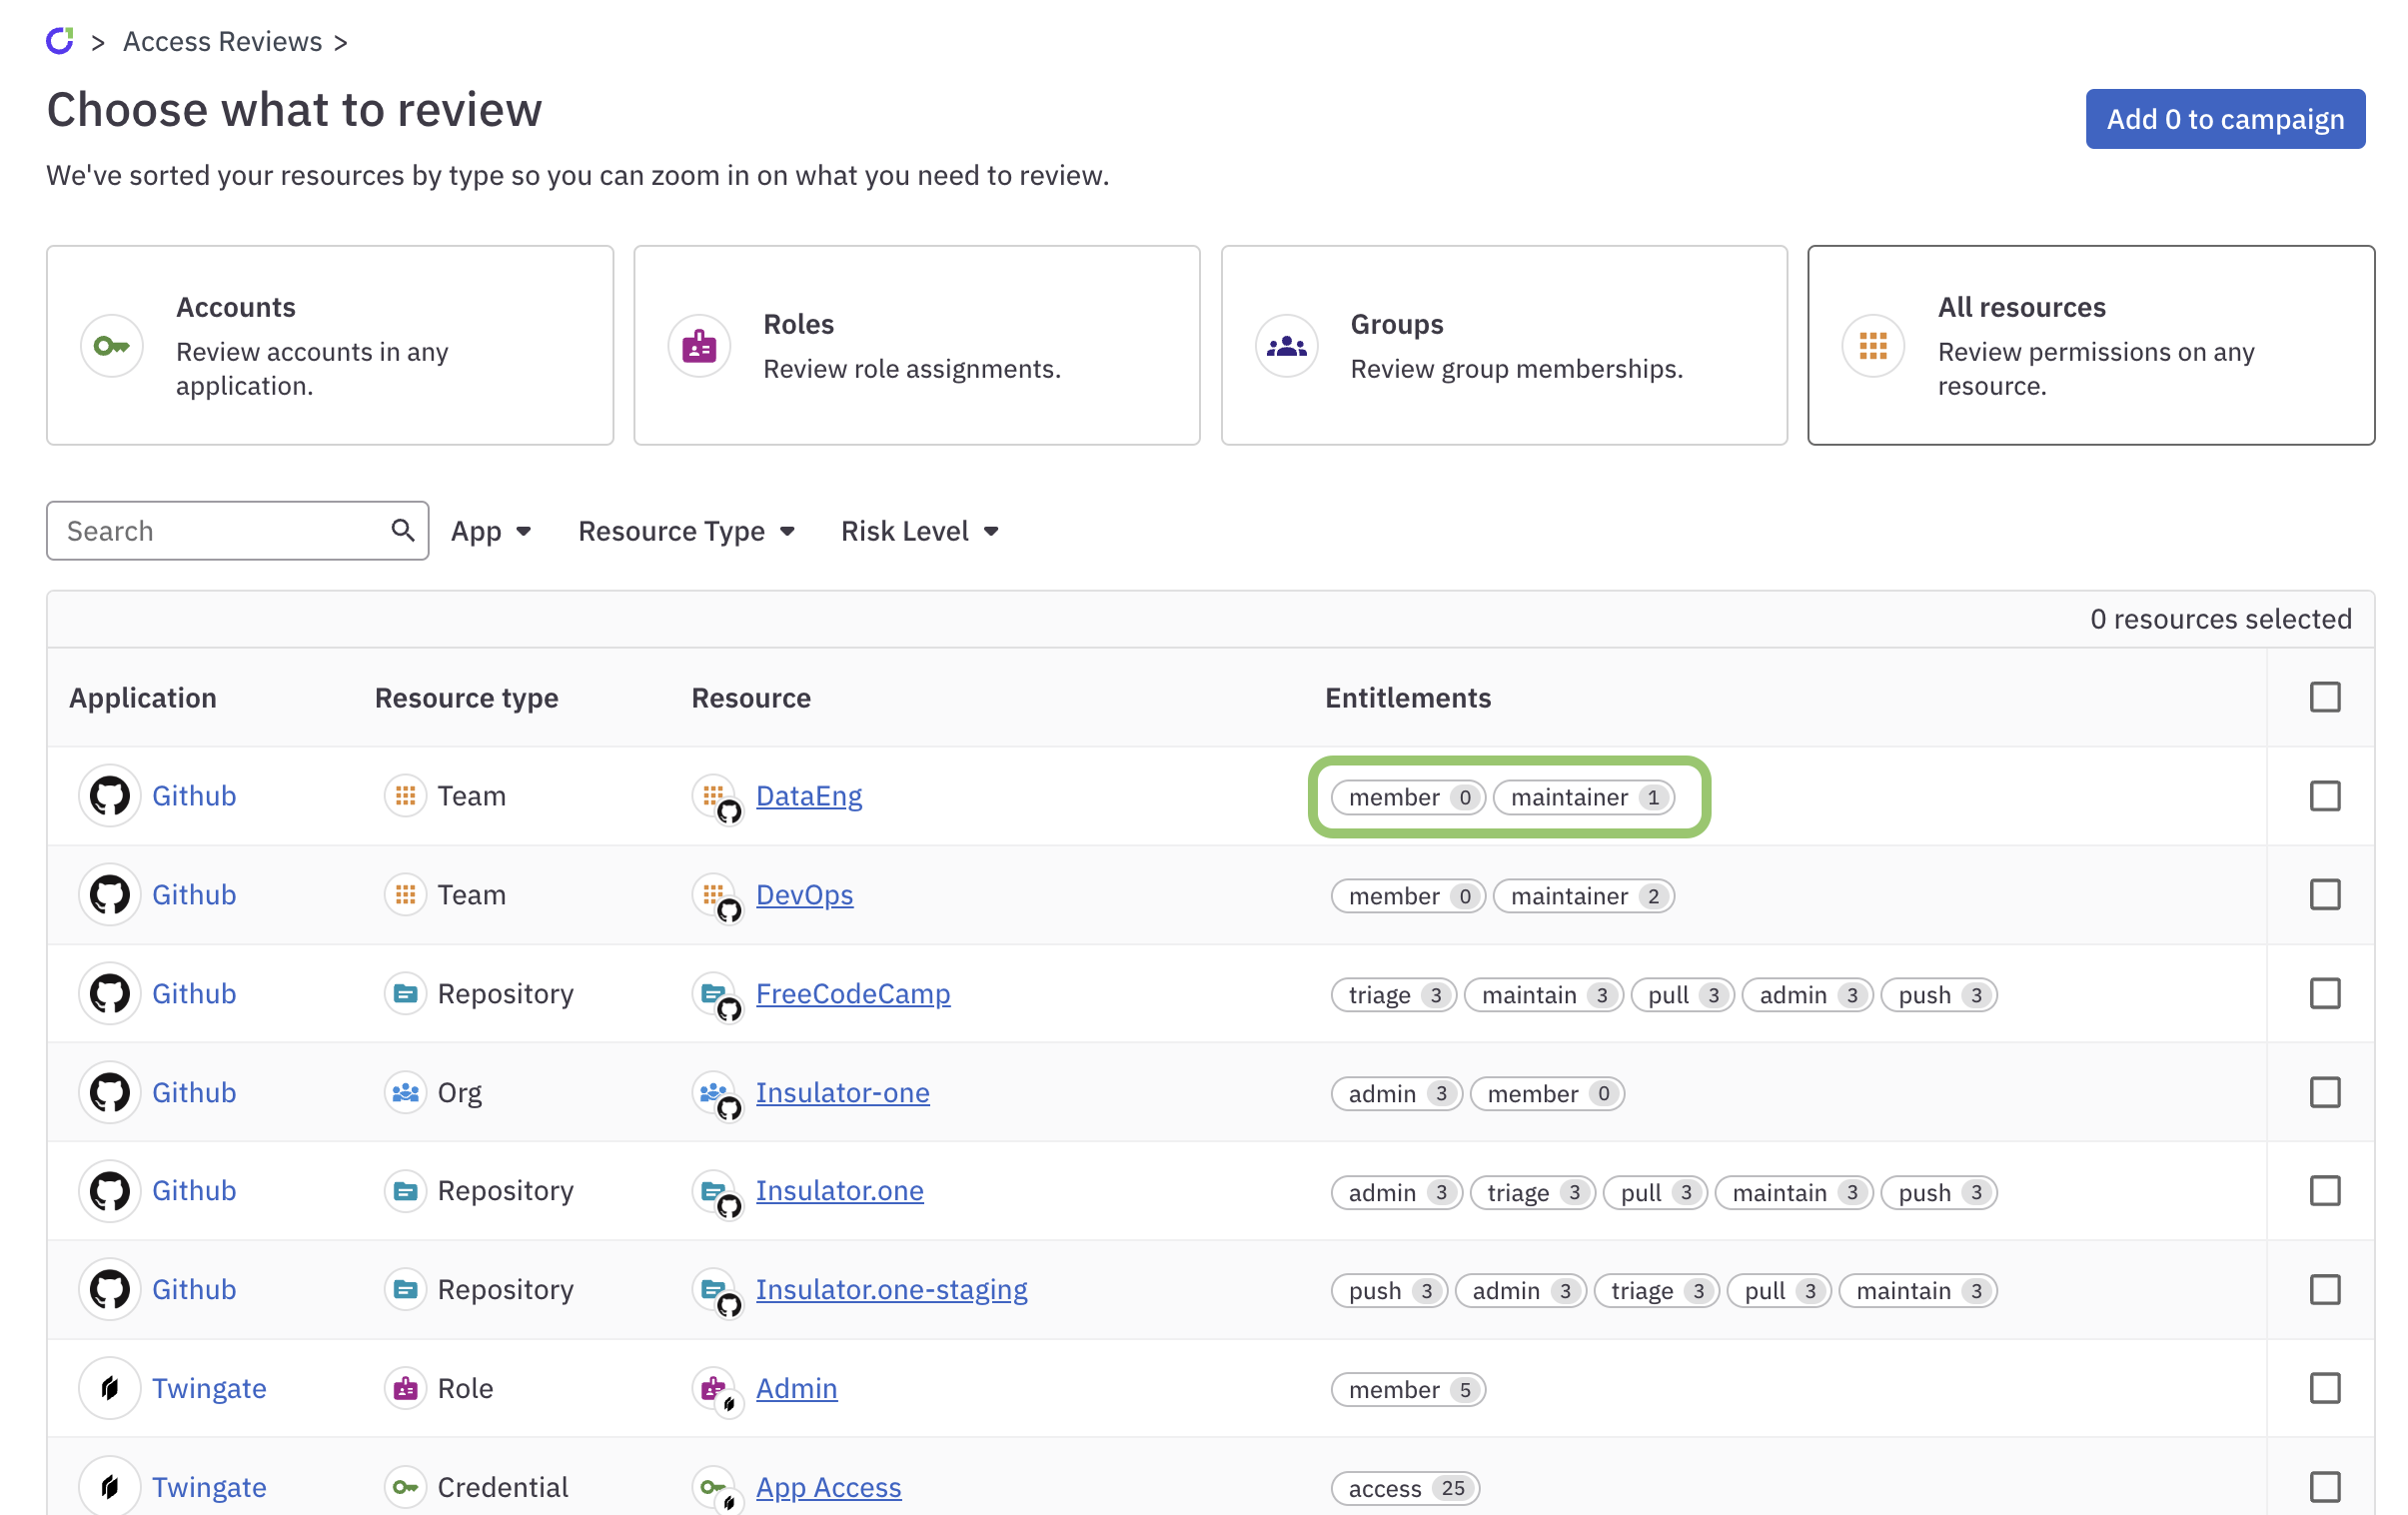
When choosing resources for a campaign, the number of accounts that are currently granted that entitlement are shown inside the slug:
Entitlement slugs are set automatically, but you can edit most of them. The exception is the app credential entitlement’s slug, which must be access.
In the navigation panel, open Apps and click Applications.
Navigate to an entitlement:
- Click the application’s name
- Click the Entitlements tab
- Locate the entitlement you want and click its name
In the Details section of the page, click Edit.
Update the entitlement summary term in the Slug field.
Click Save.
Your changes to the entitlement slug are automatically reflected in the entitlement’s display name.
Use custom entitlement attributes
Entitlements have implications across access, security, and compliance. This context is often lost, or at best stored away in a separate database or spreadsheet. You can create custom risk levels and compliance framework tags, and apply these tags to entitlements. You can then sort and select entitlements for access reviews and request catalogs by compliance framework or risk level.
Step 1: Set your attribute values
In the navigation panel, open Admin and click Settings.
Click Edit on the Attribute values section of the page.
In either the Compliance framework or Risk level field, type the name of the value you wish to add and press Enter.
Repeat the process, adding additional attribute values as needed. Click the x next to any value to remove it from the list.
If you remove an attribute that is currently in use in ConductorOne, that attribute will not be removed from any entitlements it is assigned to.
When you’re finished, click Save and confirm your action.
Step 2: Add attributes to entitlements
In the navigation panel, open Apps and click Applications.
Select an application and click Entitlements.
Select an entitlement. On the Details tab, in the Attributes area of the page, click Edit.
Select the correct risk level for the entitlement, or select None.
If applicable, select any compliance frameworks that apply to the entitlement.
Click Save.
Repeat this process on each applicable entitlement.
That’s it! You can now filter entitlements by attribute when creating an access review campaign or request catalog.
Configure how the entitlement is reviewed, revoked, requested, and provisioned
The right side of the entitlement’s details page is where you can configure key settings for how the entitlement will be requested, reviewed, revoked, and added or removed from accounts.
Access reviews settings
Configure which policy will be used to review this entitlement during user access review (UAR) campaigns. For more on these settings, go to Configure entitlement review settings.
Access revocation settings
Configure which policy will be used to review requests for revocation of this entitlement from an account. For more on revocation, go to Configure entitlement revocation settings.
Access requests settings
Configure which policy will be used to address requests for access to this entitlement, whether users can request emergency access to this entitlement, if this entitlement has a max grant duration, and which request catalogs the entitlement is included in.
You can also adjust these settings on the application’s App directory controls page. Go to Configure access requests for more on each setting.
Provisioning settings
Select the provisioning method to be used when giving a user access to this entitlement.
Connector: Uses the integration connector to automatically provision the access. Not all connectors support provisioning, and the configuration and permissions of the integration must be set up to allow provisioning where it is supported. If you choose this option but automatic provisioning via the connector isn’t available, ConductorOne will fall back to manual provisioning and assign the provisioning task to the application owner.
Manual: Select a designated human provisioner or provisioners who will manually update the user’s access. When access to the entitlement is granted, a provisioning task will be assigned to the provisioner you set here. (If multiple provisioners are set, each will be assigned the same task, each will receive a notification, but just one needs to complete the task.) You can enter instructions about how to provision this entitlement. These instructions will be included in the provisioning task.
Delegated: This option creates a binding between two entitlements, so that when one is granted, the user automatically receives access to the second entitlement as well. This in effect delegates the provisioning method to the bound entitlement. When using this option, select the entitlement from the dropdown that will grant access to the entitlement you’re configuring.
Here’s a more in-depth explanation of how this works:
You configure provisioning on Entitlement A, choosing Delegated and selecting Entitlement B from the dropdown.
ConductorOne creates an entitlement binding for you between Entitlement B and Entitlement A. To see the binding’s details, navigate to either entitlement’s details page and click Bindings.
Entitlement B has been configured to use its connector for provisioning. When a user requests access to Entitlement B and their request is approved, the connector automatically adds access to both Entitlement B and Entitlement A to the user’s application account.
ConductorOne automatically creates the binding for you. You’ll see the proposed change to the entitlement’s bindings whenever you make a change to delegated provisioning, both when the change is automatically creating a new binding for you, and when a binding will be removed if you change the provisioning strategy from delegated to manual or connector-based.
- Webhook: This option prompts you to select a webhook. Before you can use this option you must configure a webhook on the Webhooks tab of the Settings page. Whenever a user is granted access to the entitlement, the webhook will automatically fire. You can use webhooks to automate provisioning workflows for approved access, such as creating a Jira or ServiceDesk ticket or making an API call.