Set up a Snowflake connector
Availability
✅ General availability. The Snowflake connector is available to all ConductorOne users.
Capabilities
Sync user identities from Snowflake to ConductorOne
Resources supported:
- Roles
Add a new Snowflake connector
This task requires either the Connector Administrator or Super Administrator role in ConductorOne.
In ConductorOne, open Admin and click Connectors > Add connector.
Search for Snowflake and click Add.
Choose whether to add the new Snowflake connector as a data source to an existing application (and select the app of your choice) or to create a new application.
Do you SSO into Snowflake using your identity provider (IdP)? If so, make sure to add the connector to the Snowflake app that was created automatically when you integrated your IdP with ConductorOne, rather than creating a new app.
Set the owner for this connector. You can manage the connector yourself, or choose someone else from the list of ConductorOne users. Setting multiple owners is allowed.
A Snowflake connector owner must have the following permissions:
- Connector Administrator or Super Administrator role in ConductorOne
- Manage Grants global privilege in Snowflake
- Click Next.
Next steps
If you are the connector owner, proceed to Configure your Snowflake connector for instructions on integrating Snowflake with ConductorOne.
If someone else is the connector owner, ConductorOne will notify them by email that their help is needed to complete the setup process.
Configure your Snowflake connector
A user with the Connector Administrator or Super Administrator role in ConductorOne and Manage Grants global privilege in Snowflake must perform this task.
You will be required to choose a Snowflake role with Manage Grants global privilege after the initial connector setup is complete.
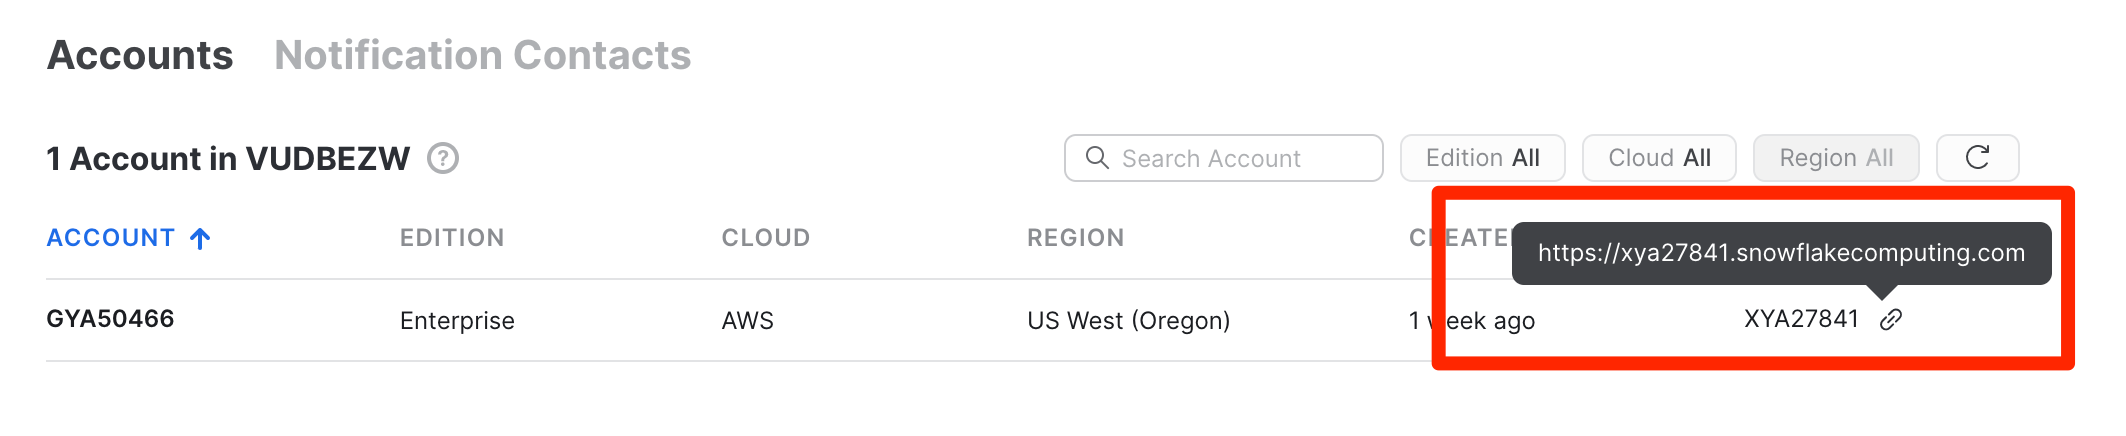
Step 1: Locate the Snowflake Locator for your account
In Snowflake, click Organization.
Locate the account you wish to connect to ConductorOne in the accounts list.
Hover over the value in the LOCATOR column, and click the copy function. We’ll use this in Step 2.
Step 2: Add your Snowflake credentials to ConductorOne
In ConductorOne, navigate to the Snowflake connector by either:
Clicking the Set up connector link in the email you received about configuring the connector.
Navigate to Admin > Connectors > Snowflake (if there is more than one Snowflake listed, click the one with your name listed as owner and the status Not connected).
Find the Settings area of the page and click Edit.
In the Account ID / Locator field, enter the locator you looked up in Step 1.
In the Username field, enter your Snowflake account username.
In the Password field, enter your Snowflake account password.
Click Save.
The connector’s label changes to Syncing, followed by Connected. You can view the logs to ensure that information is syncing.
Step 3: Choose a role in Snowflake
In Snowflake, go to User roles and click Edit.

Select a user role. A role that’s equivalent to SECURITYADMIN is required.
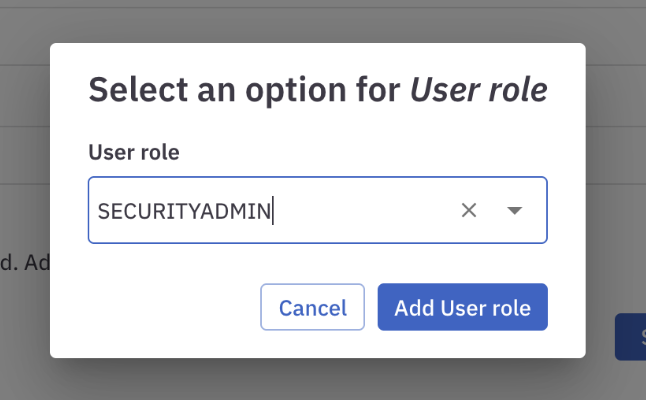
Click Add User role.
Click Save.
Return to ConductorOne. After you see the Connector updated message, click on View logs to verify that the connector syncs successfully.
That’s it! Your Snowflake connector is now pulling access data into ConductorOne.
Configure the Snowflake integration using Terraform
As an alternative to the integration process described above, you can use Terraform to configure the integration between Snowflake and ConductorOne.
See the ConductorOne Snowflake integration resource page in the ConductorOne Terraform registry for example usage and the full list of required and optional parameters.