Set up a Microsoft Entra ID connector
Capabilities
| Resource | Sync | Provision |
|---|---|---|
| Accounts | ✅ | ✅ |
| Groups | ✅ | ✅ |
| Enterprise applications | ✅ | ✅ |
| Directory roles | ✅ | ✅ |
| Licenses | ✅ |
The Entra ID connector supports automatic account provisioning.
Gather Entra ID credentials
Configuring the connector requires you to pass in credentials generated in Entra ID. Gather these credentials before you move on.
If you prefer to set up a cloud-hosted Entra ID connector using OAuth, skip ahead to the OAuth tab below.
A user with the Global Administrator permission in Entra ID must perform this task.
Create a new Entra application
In Entra admin center, navigate to App registrations.
Click + New registration.
Give the application a name, such as “ConductorOne,” and select the supported account type relevant to your Entra installation. You do not need to set a redirect URL.
Click Register.
The new app is created. Carefully copy and save the Application (client) ID and the Directory (tenant) ID shown on the application summary page.
Next, we’ll generate a client secret for this app. Click Certificates & secrets.
Click + New client secret.
Give the client secret a description and set its expiration.
Click Add.
The client secret is generated. Carefully copy and save the Secret Value.
Give the new Entra app API permissions
Click API permissions.
Click + Add permissions > Microsoft Graph.
Click Application permissions. Select each permission in the relevant set below:
To sync access data:
Application.Read.All
AppRoleAssignment.ReadWrite.All # Microsoft does not make a read-only AppRoleAssignment permission available
AuditLog.Read.All
Directory.Read.All
Group.Read.All
GroupMember.Read.All
MailboxSettings.Read
RoleAssignmentSchedule.Read.Directory
RoleEligibilitySchedule.Read.Directory
RoleManagement.Read.All
RoleManagement.Read.Directory
RoleManagementAlert.Read.Directory
RoleManagementPolicy.Read.AzureADGroup
RoleManagementPolicy.Read.Directory
ServicePrincipalEndpoint.Read.All
User.Read.All
User.ReadBasic.All
To sync access data and provision access:
Application.ReadWrite.All
AppRoleAssignment.ReadWrite.All
AuditLog.Read.All
Directory.ReadWrite.All
Group.ReadWrite.All
GroupMember.ReadWrite.All
MailboxSettings.ReadWrite
RoleAssignmentSchedule.Read.Directory
RoleEligibilitySchedule.Read.Directory
RoleManagement.Read.All
RoleManagement.Read.Directory
RoleManagementAlert.Read.Directory
RoleManagementPolicy.Read.AzureADGroup
RoleManagementPolicy.Read.Directory
ServicePrincipalEndpoint.ReadWrite.All
Synchronization.ReadWrite.All
User.ReadWrite.All
User.ReadBasic.All
Navigate to Identity > Applications > Enterprise applications > All applications.
Locate your new ConductorOne app.
If the app doesn’t appear in the list right away, wait a minute and click Refresh.
On the app’s page, click Permissions on the left side.
Click Grant admin consent for ….
That’s it! Next, move on to the connector configuration instructions.
Configure the Entra ID connector
To complete this task, you’ll need:
- The Connector Administrator or Super Administrator role in ConductorOne
- Access to the set of Entra ID credentials generated by following the instructions above
Follow these instructions to use a built-in, no-code connector hosted by ConductorOne.
In ConductorOne, navigate to Admin > Connectors and click Add connector.
Search for Entra ID and click Add.
Choose how to set up the new Entra ID connector:
Add the connector to a currently unmanaged app (select from the list of apps that were discovered in your identity, SSO, or federation provider that aren’t yet managed with ConductorOne)
Add the connector to a managed app (select from the list of existing managed apps)
Create a new managed app
Set the owner for this connector. You can manage the connector yourself, or choose someone else from the list of ConductorOne users. Setting multiple owners is allowed.
If you choose someone else, ConductorOne will notify the new connector owner by email that their help is needed to complete the setup process.
Click Next.
Find the Settings area of the page and click Edit.
Select Client secret.
Paste the tenant ID into the Entra tenant ID field.
Paste the client ID into the Entra client ID field.
Paste the client secret into the Entra client secret field.
Optional. Check the box if you want to Skip syncing Active Directory Server groups.
Optional If you connect to a Microsoft Graph API domain other than graph.microsoft.com, specify your domain in the Microsoft Graph domain field.
Optional. To capture Entra usage data, click to enable Fetch user sign-in activity.
The usage data feature requires a Microsoft Entra ID P1 or P2 license. Usage data collection is not supported on Microsoft Entra ID Free licenses.
Optional. Click to opt into Schedule SCIM provisioning, which forces an Entra SCIM sync when a new entitlement is provisioned for a user in ConductorOne.
Optional. Click to Disable resource changed event feed. These logs are enabled by default.
Make sure to disable this feed if the
List directoryAuditsAPI endpoint is not supported in your location.Click Save.
The connector’s label changes to Syncing, followed by Connected. You can view the logs to ensure that information is syncing.
That’s it! Your Entra ID connector is now pulling access data into ConductorOne.
Follow these instructions to set up a built-in, no-code connector hosted by ConductorOne using OAuth.
Step 1: Log in with OAuth
In ConductorOne, navigate to Admin > Connectors and click Add connector.
Search for Entra ID and click Add.
Choose how to set up the new Entra ID connector:
Add the connector to a currently unmanaged app (select from the list of apps that were discovered in your identity, SSO, or federation provider that aren’t yet managed with ConductorOne)
Add the connector to a managed app (select from the list of existing managed apps)
Create a new managed app
Set the owner for this connector. You can manage the connector yourself, or choose someone else from the list of ConductorOne users. Setting multiple owners is allowed.
If you choose someone else, ConductorOne will notify the new connector owner by email that their help is needed to complete the setup process.
Click Next.
Find the Settings area of the page and click Edit.
Select OAuth.
Specify the ID of the Entra tenant you’re integrating in the Entra tenant ID field.
Optional. Check the box if you want to Skip syncing Active Directory Server groups.
Optional If you connect to a Microsoft Graph API domain other than graph.microsoft.com, specify your domain in the Microsoft Graph domain field.
Optional. To capture Entra usage data, click to enable Fetch user sign-in activity.
The usage data feature requires a Microsoft Entra ID P1 or P2 license. Usage data collection is not supported on Microsoft Entra ID Free licenses.
Optional. Click to opt into Schedule SCIM provisioning, which forces an Entra SCIM sync when a new entitlement is provisioned for a user in ConductorOne.
Click Login with OAuth.
Log in and authorize ConductorOne with your Entra ID instance.
In order for the integration to work properly, you must consent to all permissions:

Step 2: Grant permissions to the ConductorOne app
In the Entra ID control panel, go to Enterprise Applications.
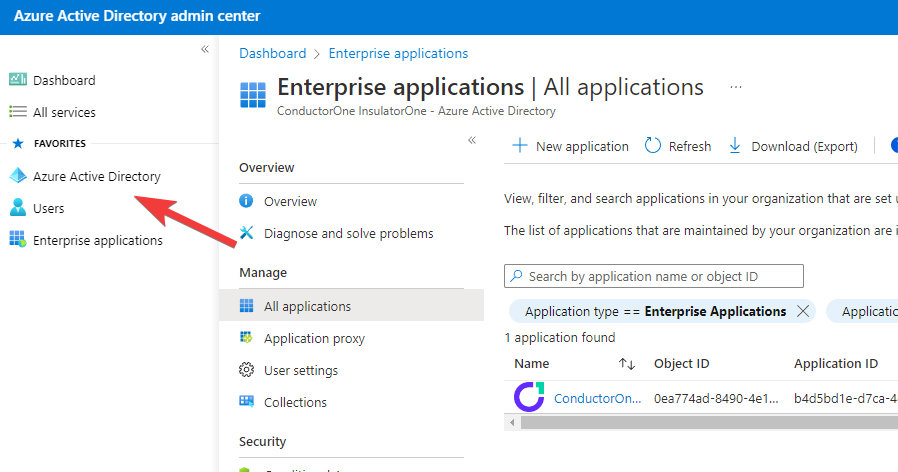
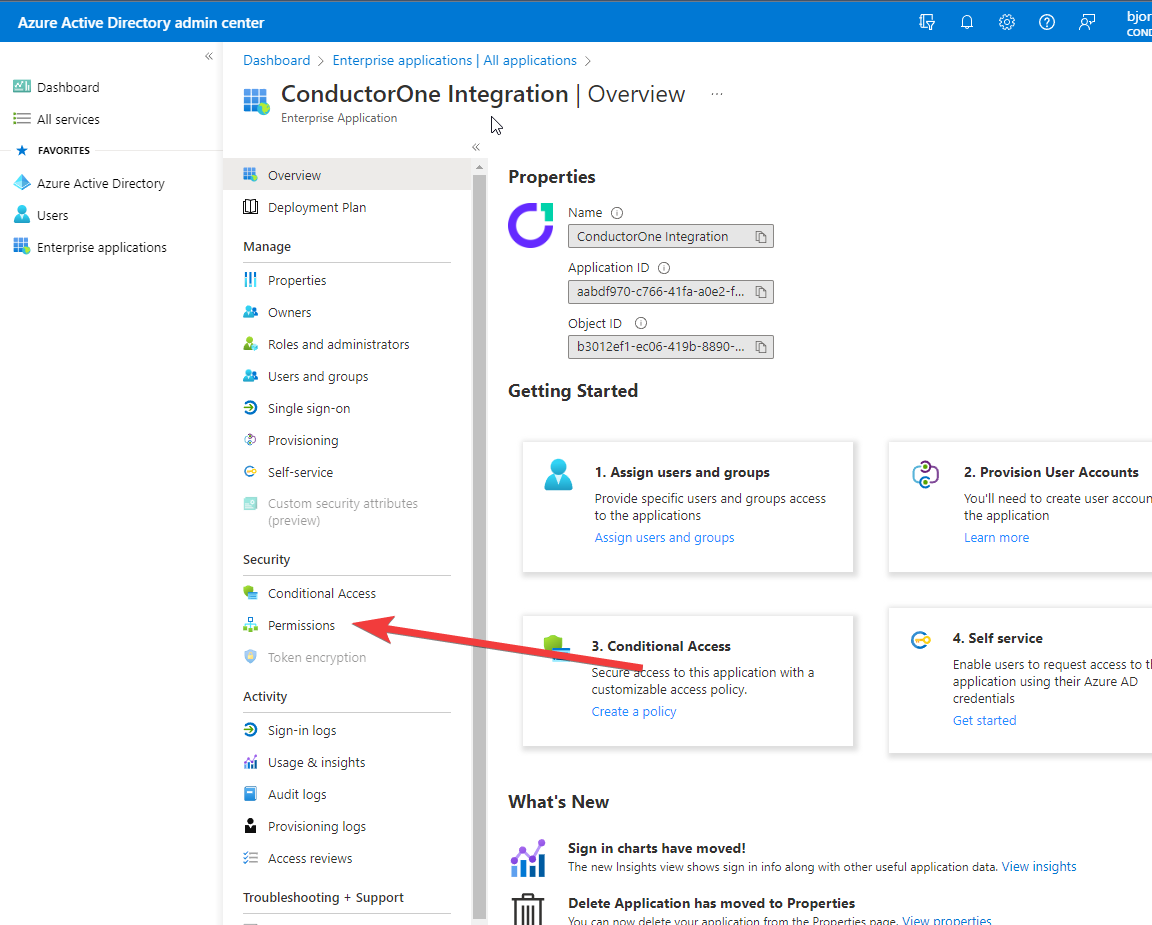
Click the ConductorOne Integration app (not to be confused with the ConductorOne SSO app, which is used to log into ConductorOne, not to synchronize your data).
If the ConductorOne Integration app doesn’t appear in the list of apps right away, wait a minute and click Refresh.
On the ConductorOne Integration page, click Permissions on the left side.
Follow these instructions to use the Entra ID connector, hosted and run in your own environment. Contact ConductorOne’s support team to download the latest version of the connector and get detailed setup instructions.
When running in service mode on Kubernetes, a self-hosted connector maintains an ongoing connection with ConductorOne, automatically syncing and uploading data at regular intervals. This data is immediately available in the ConductorOne UI for access reviews and access requests.
Step 1: Set up a new Entra ID connector
In ConductorOne, navigate to Connectors > Add connector.
Search for Baton and click Add.
Choose how to set up the new Entra ID connector:
Add the connector to a currently unmanaged app (select from the list of apps that were discovered in your identity, SSO, or federation provider that aren’t yet managed with ConductorOne)
Add the connector to a managed app (select from the list of existing managed apps)
Create a new managed app
Set the owner for this connector. You can manage the connector yourself, or choose someone else from the list of ConductorOne users. Setting multiple owners is allowed.
If you choose someone else, ConductorOne will notify the new connector owner by email that their help is needed to complete the setup process.
Click Next.
In the Settings area of the page, click Edit.
Click Rotate to generate a new Client ID and Secret.
Carefully copy and save these credentials. We’ll use them in Step 2.
Step 2: Create Kubernetes configuration files
Create two Kubernetes manifest files for your Entra ID connector deployment:
Secrets configuration
# baton-microsoft-entra-secrets.yaml
apiVersion: v1
kind: Secret
metadata:
  name: baton-microsoft-entra-secrets
type: Opaque
stringData:
  # ConductorOne credentials
  BATON_CLIENT_ID: <ConductorOne client ID>
  BATON_CLIENT_SECRET: <ConductorOne client secret>

  # Entra ID credentials
  BATON_ENTRA_CLIENT_ID: <Entra ID application (client) ID>
  BATON_ENTRA_CLIENT_SECRET: <Entra ID client secret>
  BATON_ENTRA_TENANT_ID: <Entra ID directory (tenant) ID>

  # Optional: include if you want ConductorOne to provision access using this connector
  BATON_PROVISIONING: true

  # Optional: include if you want to skip syncing Active Directory Server groups
  BATON_SKIP_AD_GROUPS: true

  # Optional: include if you want to connect to a domain other than graph.microsoft.com
  BATON_GRAPH_DOMAIN: <Microsoft Graph API domain>

  # Optional: include if you want to disable audit logs
  BATON_ENABLE_AUDIT_LOG_FEED: false
See the connector’s README or run --help to see all available configuration flags and environment variables.
Deployment configuration
# baton-microsoft-entra.yaml
apiVersion: apps/v1
kind: Deployment
metadata:
  name: baton-microsoft-entra
  labels:
    app: baton-microsoft-entra
spec:
  selector:
    matchLabels:
      app: baton-microsoft-entra
  template:
    metadata:
      labels:
        app: baton-microsoft-entra
        baton: true
        baton-app: microsoft-entra
    spec:
      containers:
      - name: baton-microsoft-entra
        image: ghcr.io/conductorone/baton-microsoft-entra:latest
        imagePullPolicy: IfNotPresent
        envFrom:
        - secretRef:
            name: baton-microsoft-entra-secrets
Step 3: Deploy the connector
Create a namespace in which to run ConductorOne connectors (if desired), then apply the secret config and deployment config files.
Check that the connector data uploaded correctly. In ConductorOne, click Applications. On the Managed apps tab, locate and click the name of the application you added the Entra ID connector to. Entra ID data should be found on the Entitlements and Accounts tabs.
That’s it! Your Entra ID connector is now pulling access data into ConductorOne.
What’s next?
If Entra ID is your company’s identity provider (meaning that it is used to SSO into other software), the integration sync will automatically create applications in ConductorOne for all of your SCIMed software. Before you move on, review the Create applications page for important information about how to set up integrations with the SCIMed apps.