Use Baton to get Splunk alerts when a new GitHub admin is added
For this tutorial we will use Splunk as our SIEM. Splunk is software that helps capture, index, and correlate real-time data in a searchable repository, from which it can generate graphs, reports, alerts, dashboards, and visualizations.
After reading this guide, you will be able to:
- Understand how to setup and use Baton and the
baton-githubconnector - Understand how to set up Splunk
- Understand how to use AWS S3 in cooperation with Baton
- Understand how to generate alerts
Before you start
Before you begin, make sure you have everything set up from the list below:
Part one: Set up the Baton SDK
Use this commands to install the Baton SDK and Baton GitHub connector:
$ brew install conductorone/baton/baton conductorone/baton/baton-githubIf you don’t have Homebrew installed yet, follow this guide.
Inspect the
batontool by using this command:$ baton --help
After running baton --help, you will see a console with all available commands. You can find a list of all the commands in our CLI getting started guide, where we explain them in detail.
Now you have the baton tool ready to use. It’s time to set up an AWS S3 bucket, and then we’ll show you how to use the Baton GitHub connector to sync your data locally into a c1z file.
Part two: Create an AWS S3 bucket
- As a next step, you need to create a new AWS S3 bucket. This file will be used as storage for the files exported using Baton.
If you are not sure how to create an S3 bucket, check the official AWS guide on how to work with AWS S3.
- Once your AWS S3 is created, copy these credentials:
ACCESS KEY IDREGIONSECRET ACCESS KEY
- Save your credentials. You will need them later.
Part three: Connect GitHub connector
The baton-github connector allows you to inspect access rights for all users across all repositories. Setting up the connector is very simple, so let’s take a look at how to do it.
Create a new GitHub Personal Access Token with the following permissions:
Area Scope of access repo All admin:org All user All Create a new file
sync.sh.Make
sync.shexecutable:
chmod +x sync.sh
- Insert this code into the
sync.sh:
#!/bin/bash
set -e

# Set your tokens here!
export BATON_TOKEN="your github access token"
export BATON_ORGS="your github organization(s) separated by comma"
export AWS_ACCESS_KEY_ID="your AWS access key"
export AWS_SECRET_ACCESS_KEY="your AWS secret access key"
export AWS_BUCKET="your AWS bucket name"
export AWS_REGION="your AWS bucket region"

# Set the output filenames
now=$(date +"%Y%m%d%H%M%S")
s3bucket="s3://$AWS_BUCKET"
c1zFile="$s3bucket/baton-sync-siem.c1z"
jsonFile="sync-github-$now.json"

# Run sync to produce c1z
baton-github -f "$c1zFile"

# Run a diff
baton -f "$c1zFile" diff -o json | jq -c '.[]' > "./$jsonFile"

# Upload file to S3 to be processed by Splunk Add-On for AWS
aws s3 mv "./$jsonFile" "$s3bucket/siem/$jsonFile"
Insert your GitHub access token and GitHub org into the code shown above.
Save
sync.sh.
About the c1z file
c1zfiles contain all of the information that the connector has collected as part of a synchronization process. Using the Baton CLI, you can browse the contents of thesync.c1zfile and export that data to a .csv or .xlsx file.
Part four: Set up your Splunk and prepare AWS plugin
Next, we need to set up Splunk as our SIEM system and configure generic AWS S3 inputs.
- First of all, create a new Splunk cloud account and follow the Splunk email instructions.
Not a Splunk user? You can try a free trial.
Log into Splunk Cloud via your credentials provided by Splunk.
Click on “Apps” and look for “Find More Apps”

- Look for “Splunk Add-on for Amazon Web Services (AWS)”. With this plugin you will be able to use a single Add-on across all AWS data sources for ingesting data into Splunk.
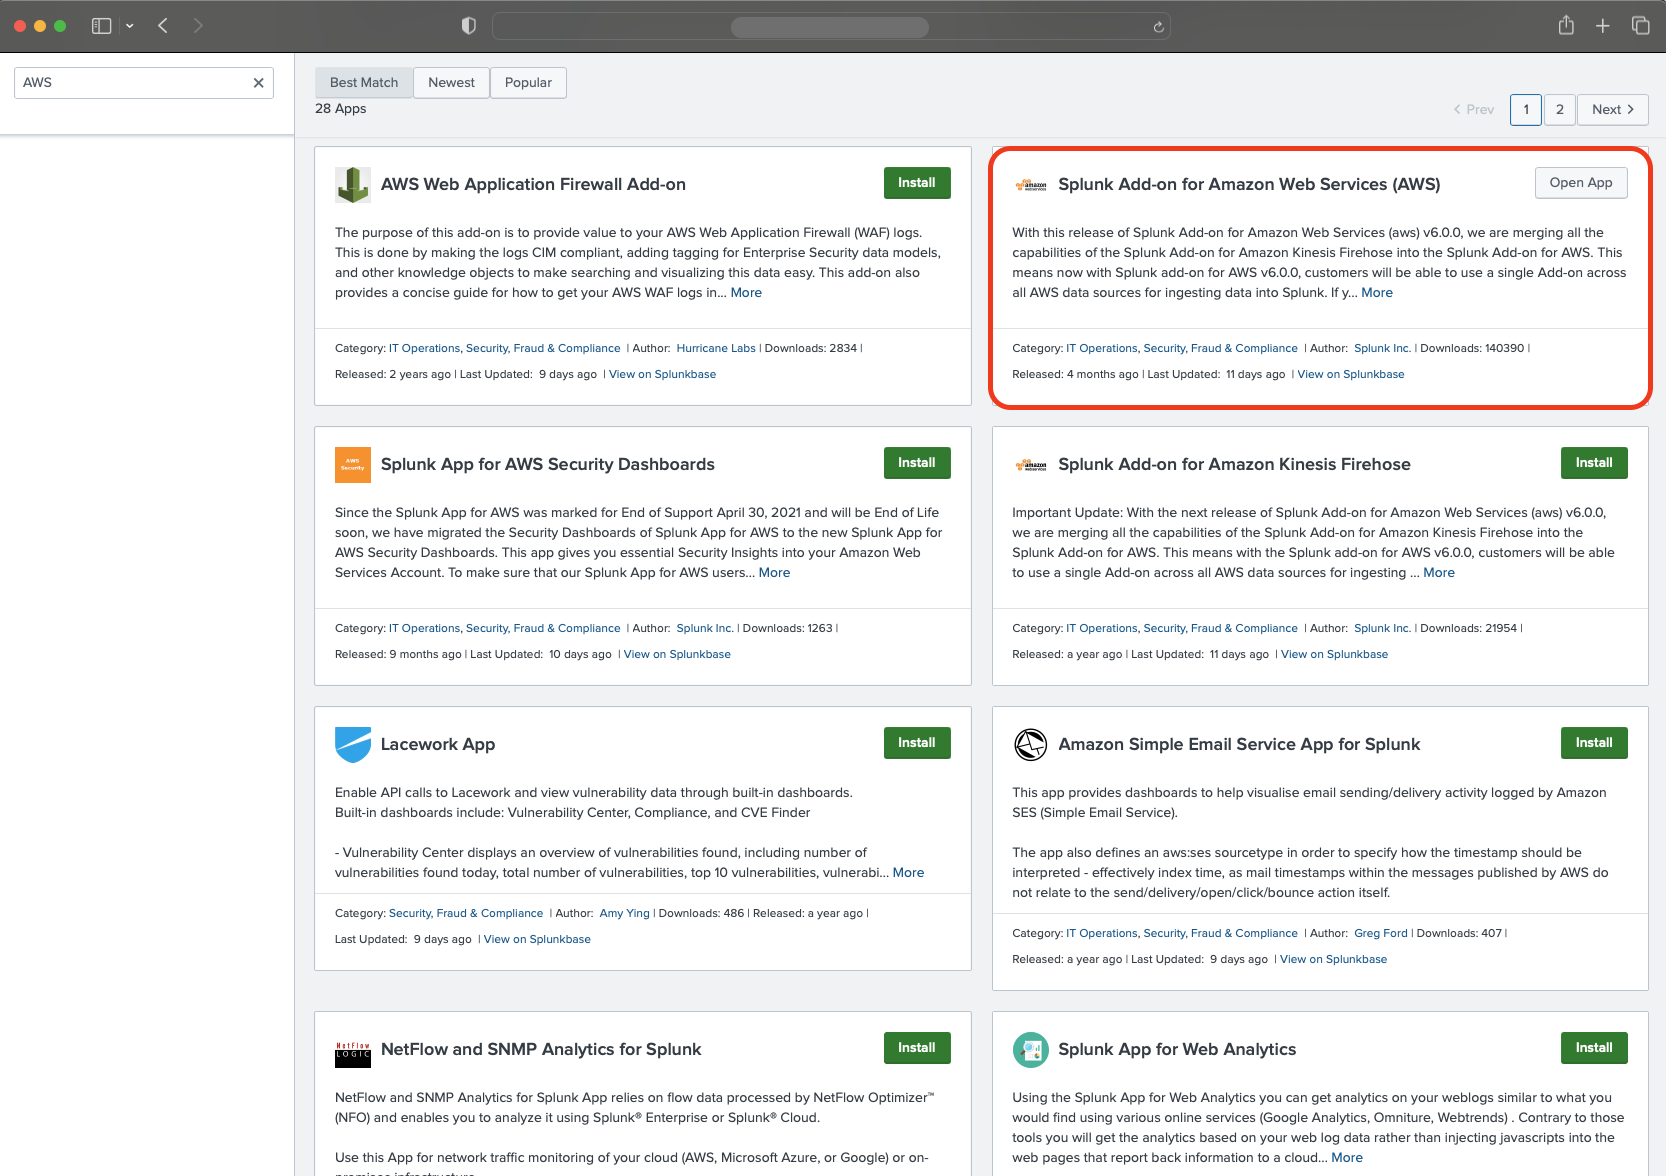
- Install the plugin.
Your AWS plugin is ready to use. In the next step, we will connect Splunk with AWS.
Part five: Set up your AWS plugin
After successful installation we need to connect our AWS account to Splunk.
Open “Splunk Add-on for AWS” plugin and go to the “Configuration” tab.
Add a new AWS account by clicking on “Add” in the “Account” tab.
Go to the “Inputs” tab and click “Create New input”.
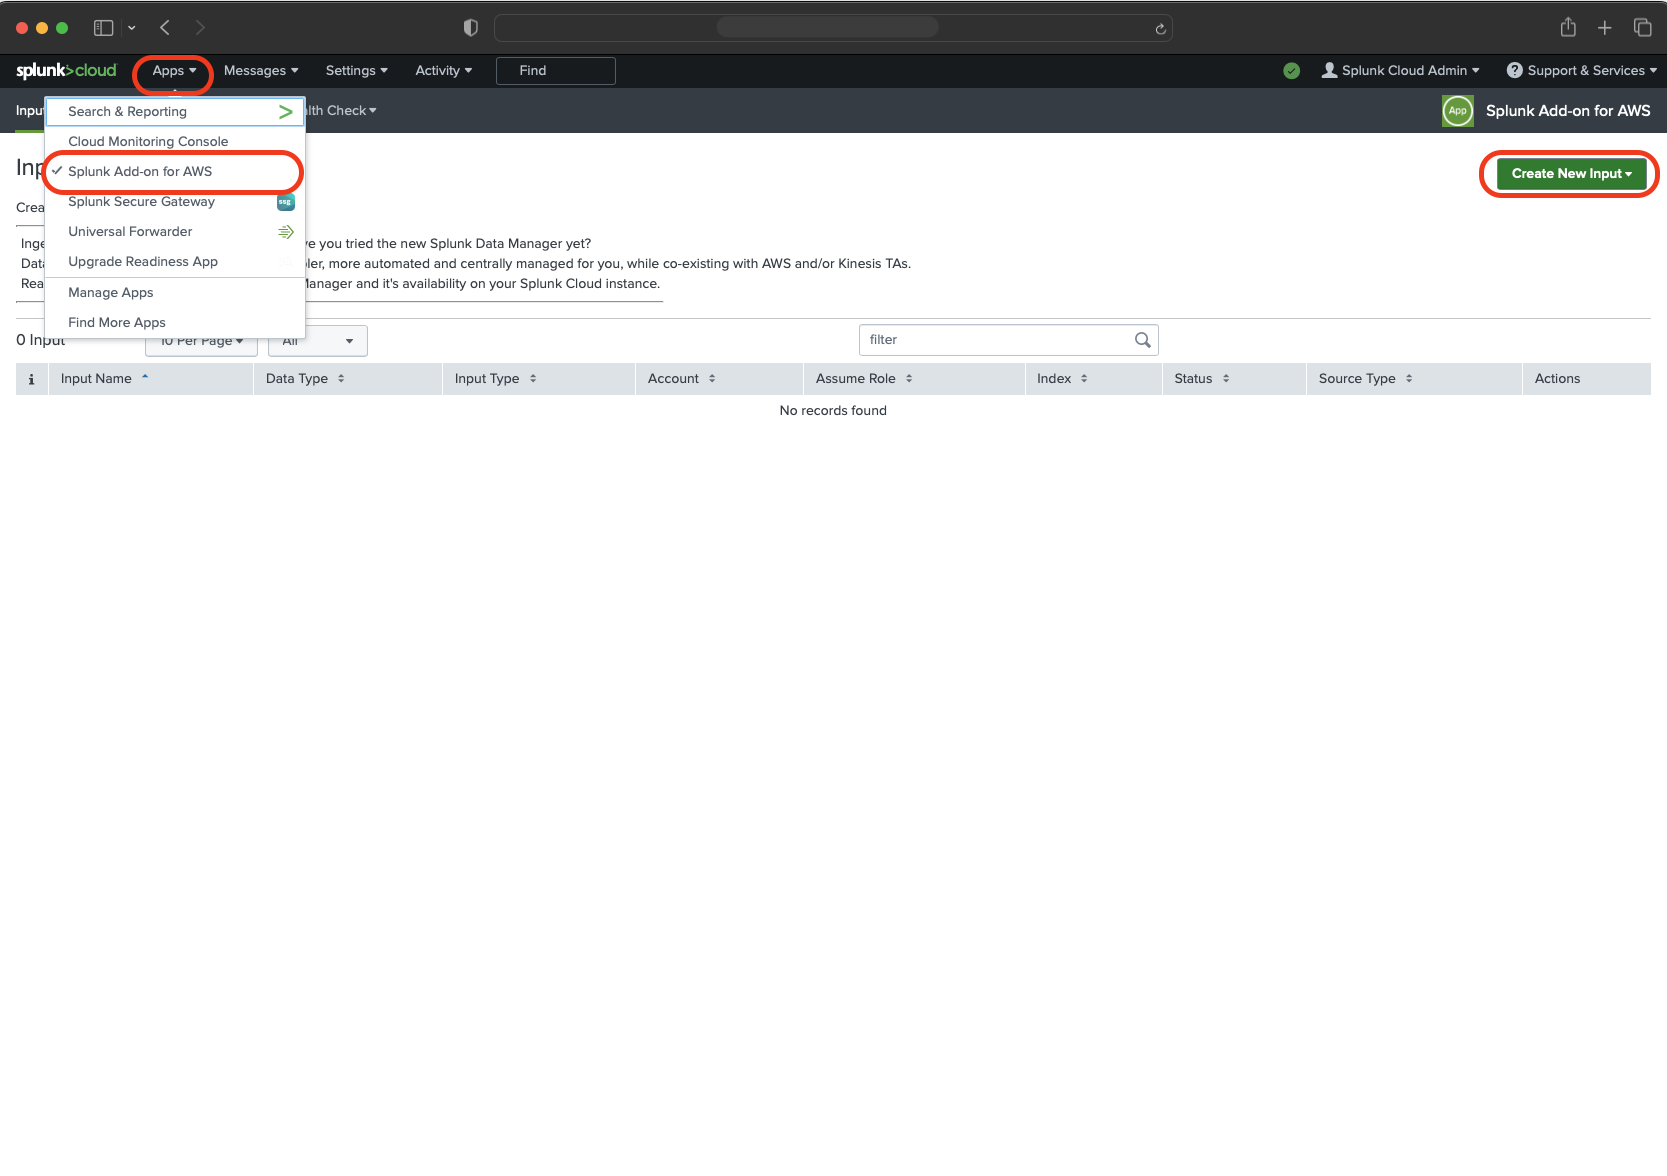
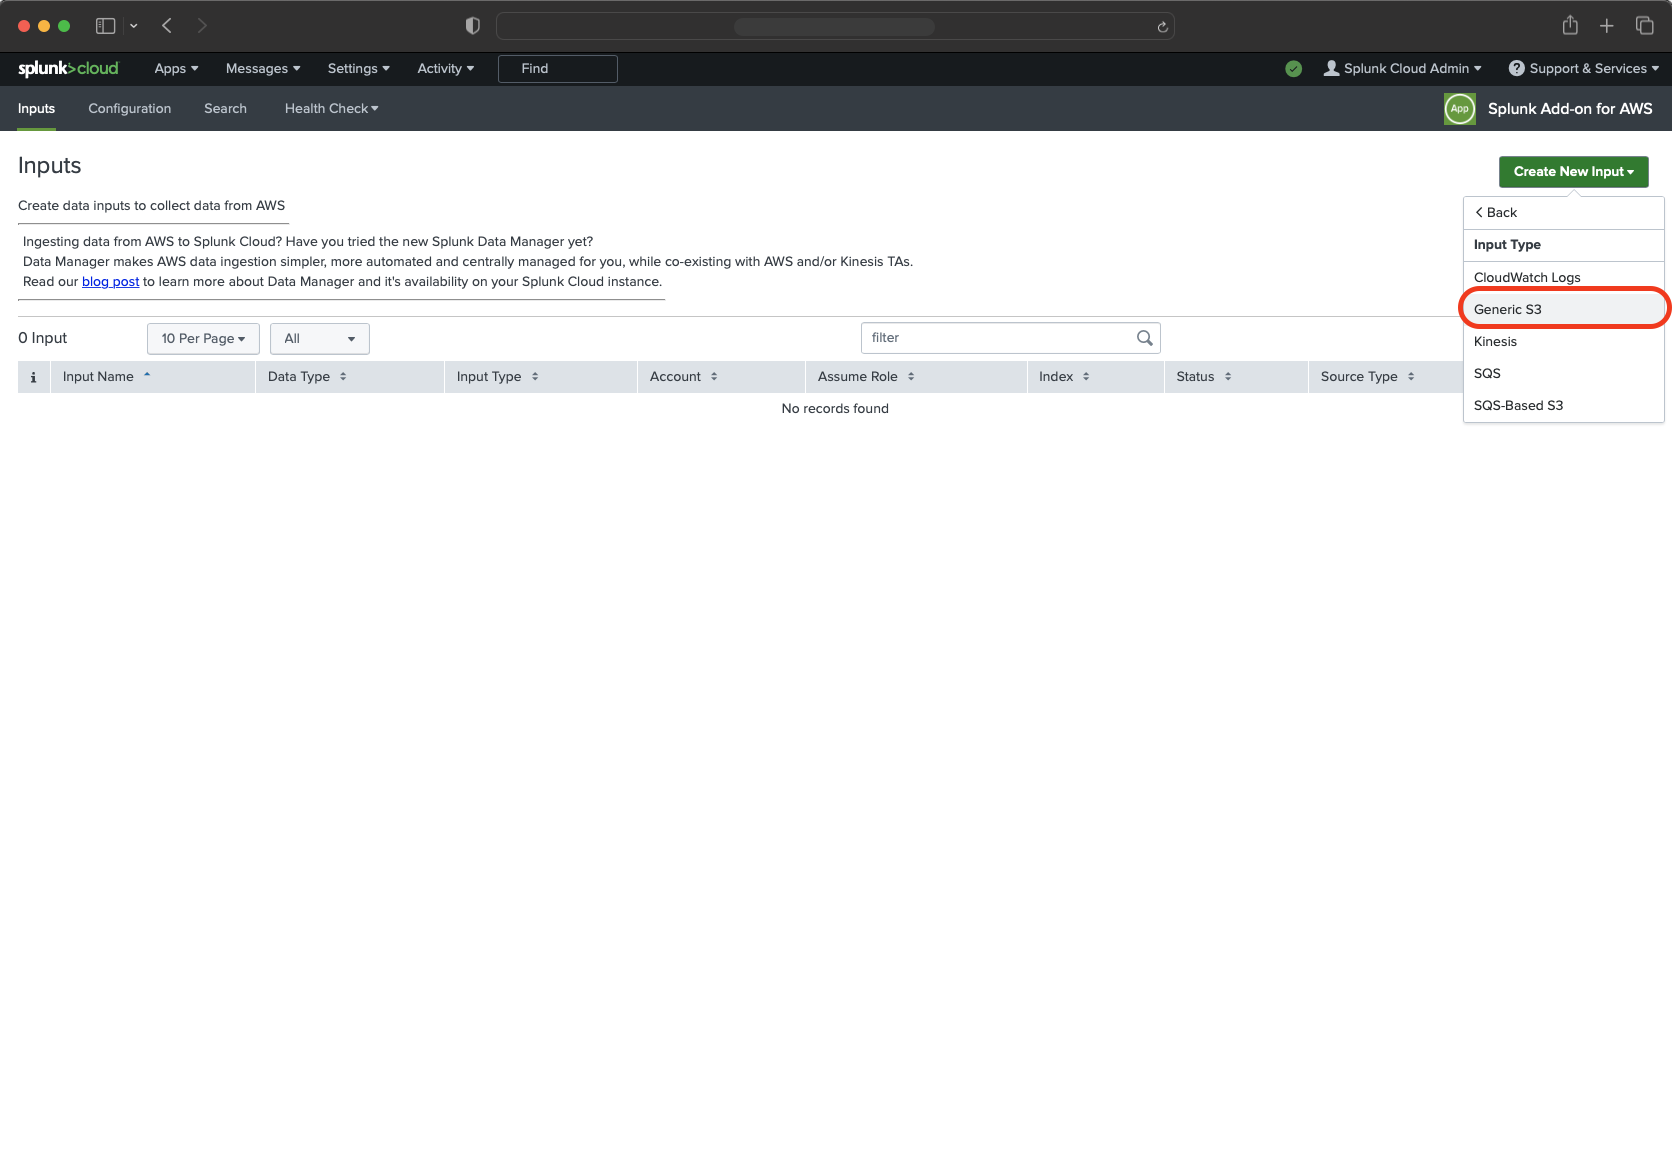
- Select “Custom Data Type” and next “Generic S3”.
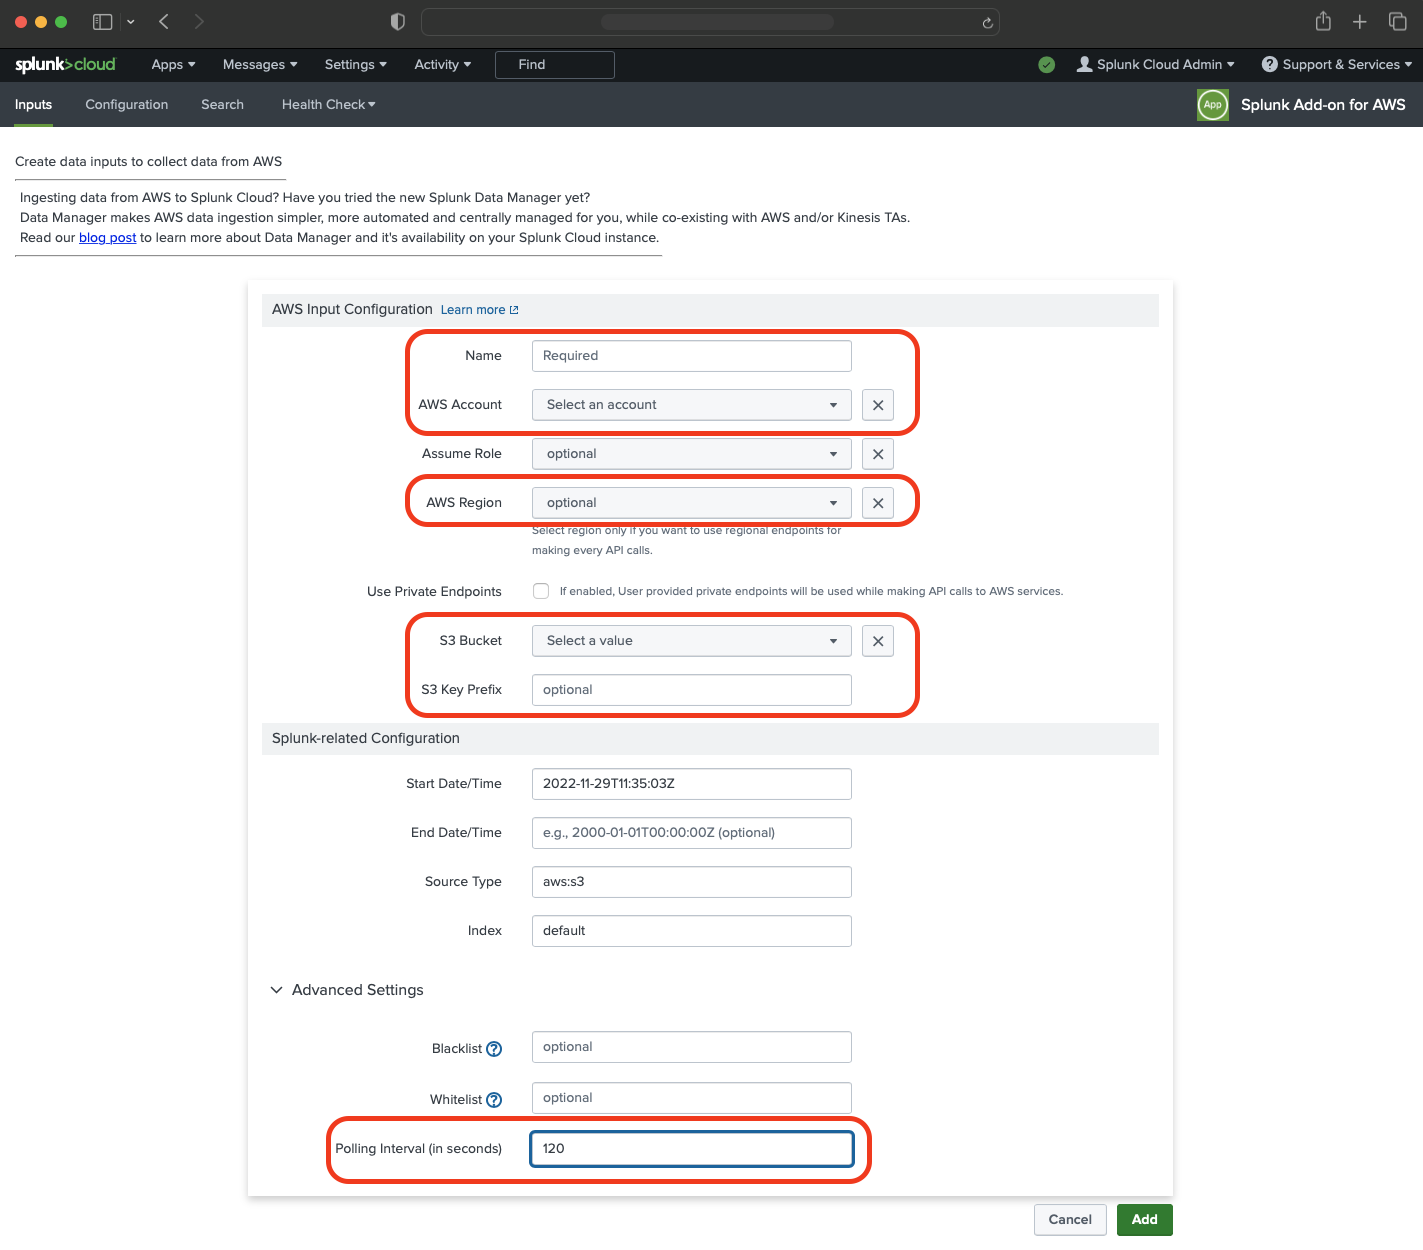
- Fill in your credentials:
- Name of AWS configuration
- AWS account
- S3 Bucket (depending on your naming)
- S3 Key Prefix (
siem/) - Source Type
- Polling Internal (Make sure that you change “Polling Internal” in “Advanced Settings” to 120 seconds!)
Save your changes.
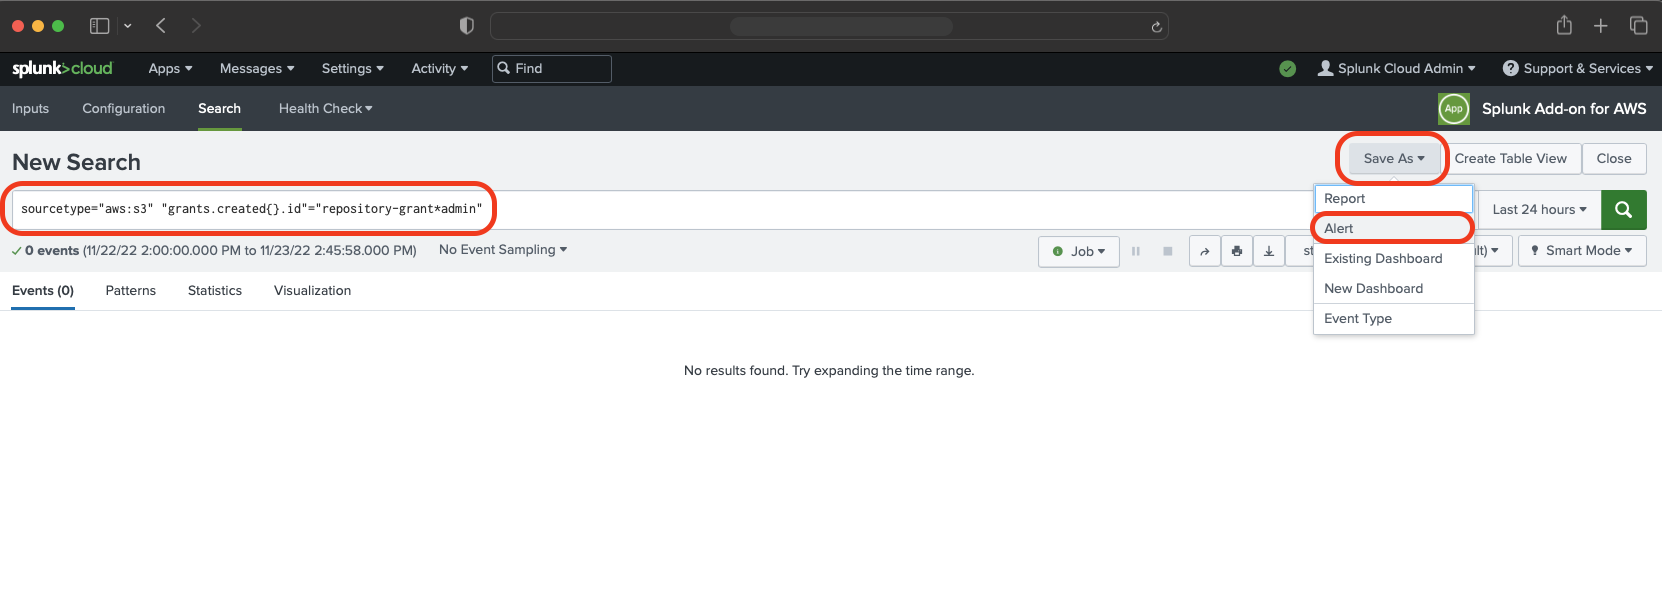
Go to the Search tab and paste:
sourcetype="aws:s3" "grants.created{}.id"="repository:*:admin:*".
With this filter you will only see the records when a new admin is created for the repository.
- Click “Save as” and select “Alert”.
In this window set up your alert with:
- Name of an alert
- Description of the alert
Configure the schedule for the search alert. This dictates how often Splunk will look to see if any logs match the search query above.
Add a Trigger Action.
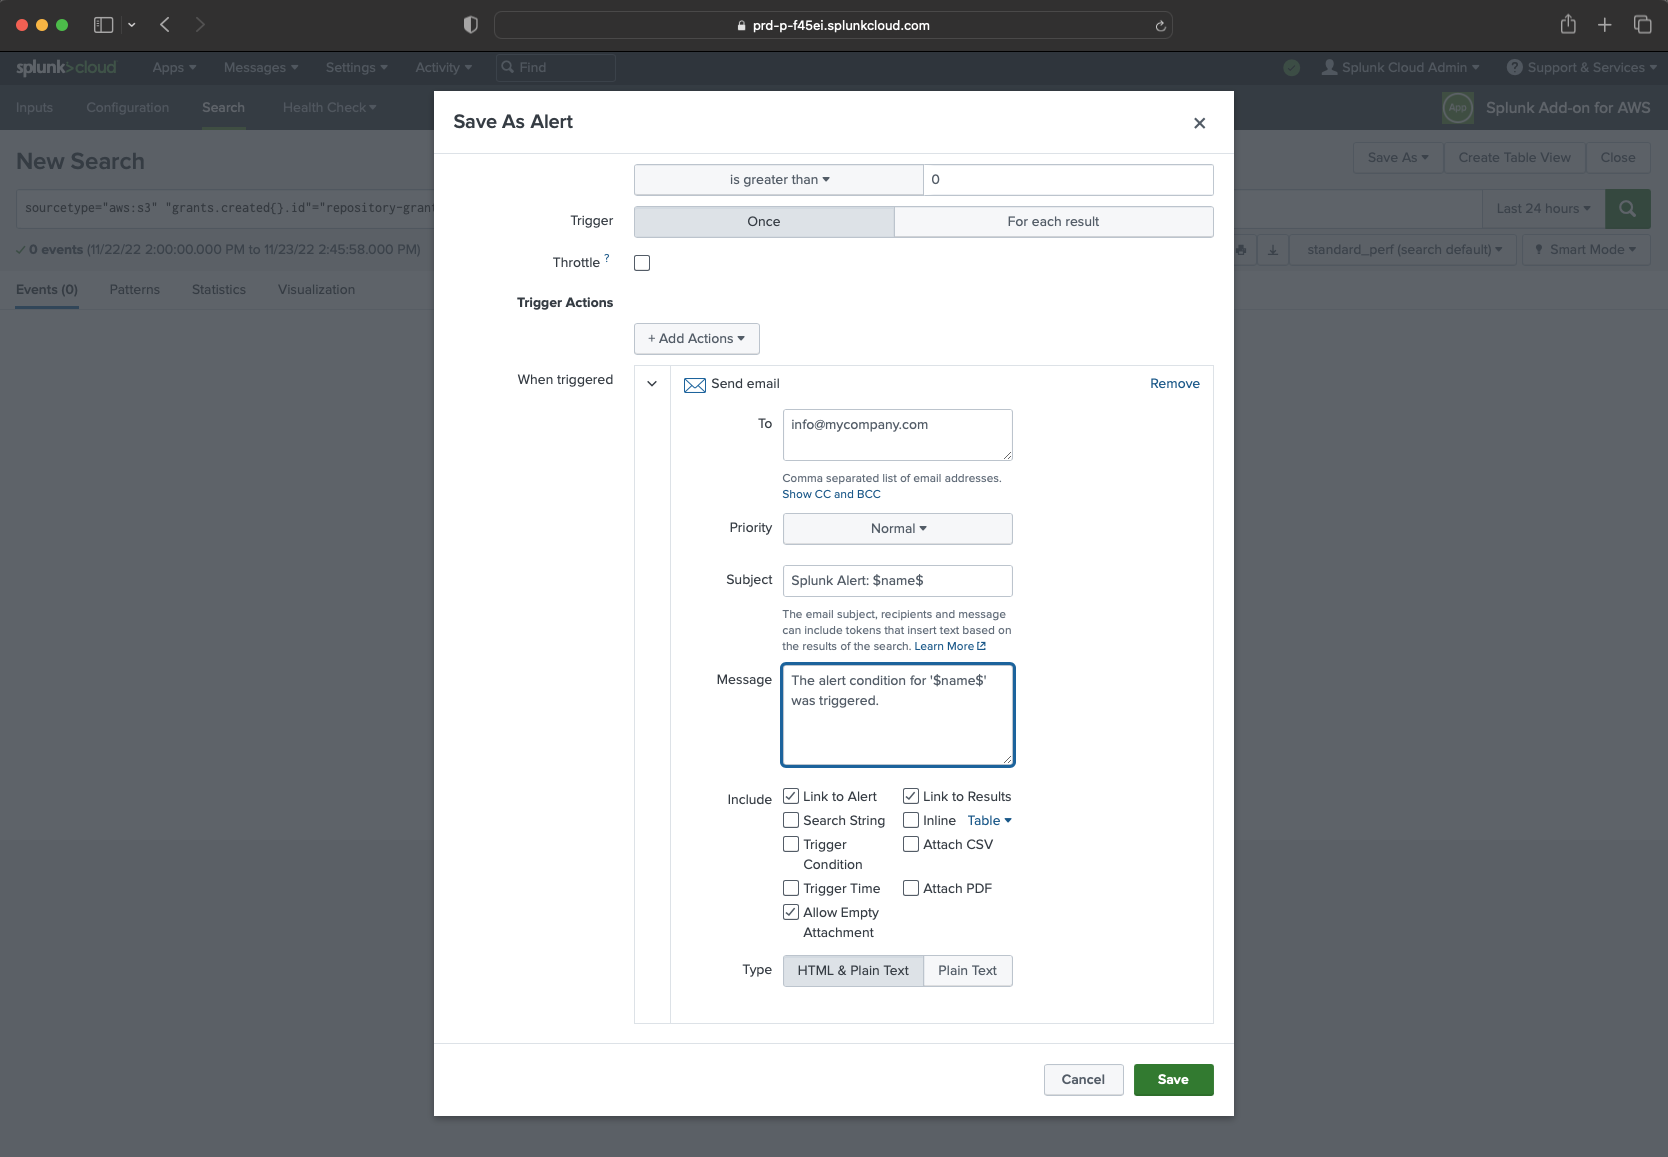
In our case, we will use email action.
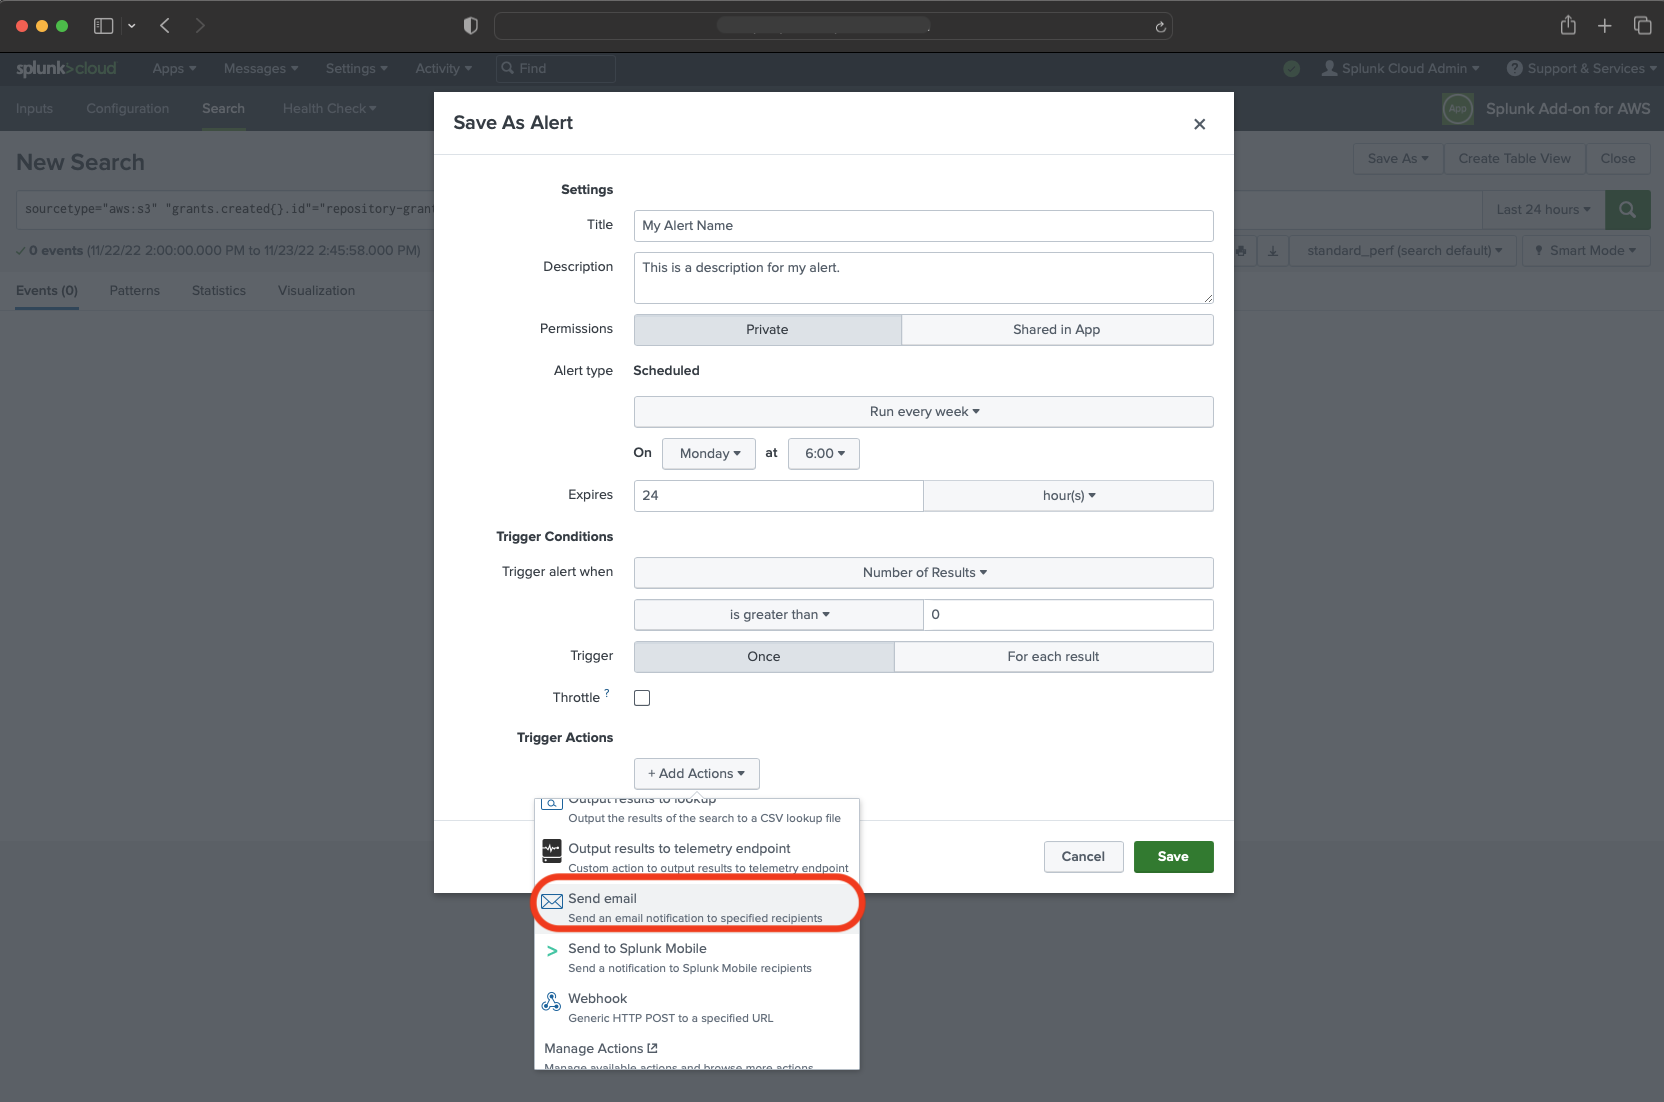
- Setup email notifications conditions by your preferences.
That’s it! Splunk is ready and you will receive an email when a new admin is added to one of your repositories.
Part six: Test it out!
Populate your data with this command:
./sync.shAdd a new user in your GitHub repository and set it for user admin access.
Update your data with this command. This will send information about the newly added user to AWS S3:
./sync.shWait 120 seconds. That’s time what we set in the Splunk as a “Polling Internal”.
Check your email. You should receive a new email with an alert notification.
Got it? Good job! You successfully implemented Splunk, AWS and GitHub.
We strongly recommend changing the “Polling Interval” in Splunk back to a higher value (default: 1800). We used 120 seconds just for testing purposes.
What’s next?
By making use of Baton in your automation, you can ensure that your organization remains secure and enjoy peace of mind knowing that user data is safe and secure. With Baton you’re able to stay ahead of any potential security risks before they occur. It’s just one more way how Baton can help you protect your organization data.
Check out our other tutorials to discover the full potential of Baton: