Capabilities
| Resource | Sync | Provision |
|---|---|---|
| Accounts | ||
| Groups assigned to the AWS app | ||
| Application assignments for the AWS app |
Gather Okta credentials
Configuring the connector requires you to pass in credentials generated in Okta. Gather these credentials before you move on.API token permissions and ConductorOne capabilities
ConductorOne’s capabilities depend on the permissions of the API token used to set up the connector:| ConductorOne capability | Custom read-only token | Read-only + app admin + group admin token | Super admin token | |
|---|---|---|---|---|
| Review group membership | ||||
| Provision group membership | ||||
| Review application assignment | ||||
| Provision application assignment | ||||
| Review admin roles |
(Optional) Create a custom read-only admin role
To give the ConductorOne integration limited read-only admin permissions, you’ll need to create a custom Okta admin role and resource set and assign them to the admin you’ll use to generate the API key.Give the role the View roles, resources, and admin assignments permission (this is found in the Identity and access management permissions section).
Find the Identity and access management resource type and select View roles, resources, and admin assignments.
Now we’ll assign the resource set to an admin. (If you need to do so, make a service account following the instructions below, then return to finish this process.) Click Edit on the new resource set and select View or edit assignments.
In the Complete the assignment section of the page, select the role and resource set you just created.
(Optional) Create a service account for the API token
If desired, you can create a service account user in Okta that has the permissions for the API token.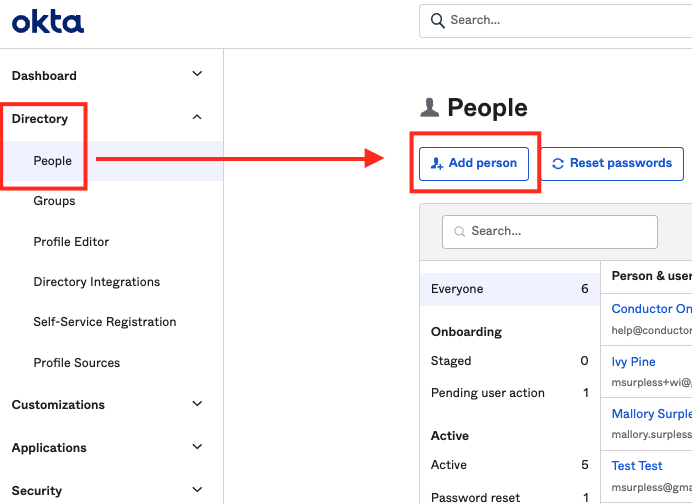
Enter the necessary user details to create a user. You might want to use identifiers that make it easily recognizable as a service account, such as First Name: ReadOnly, Last Name: ServiceUser.
Select the administrator roles to grant: Super Administrator or a combination of Read Only + Application Admin + Group Admin.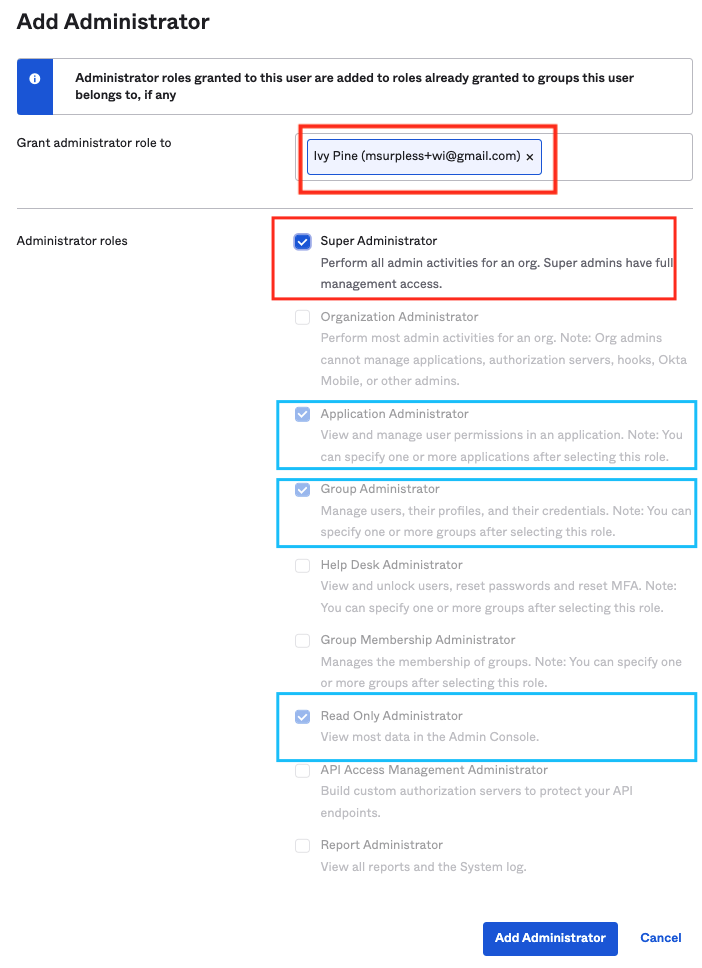
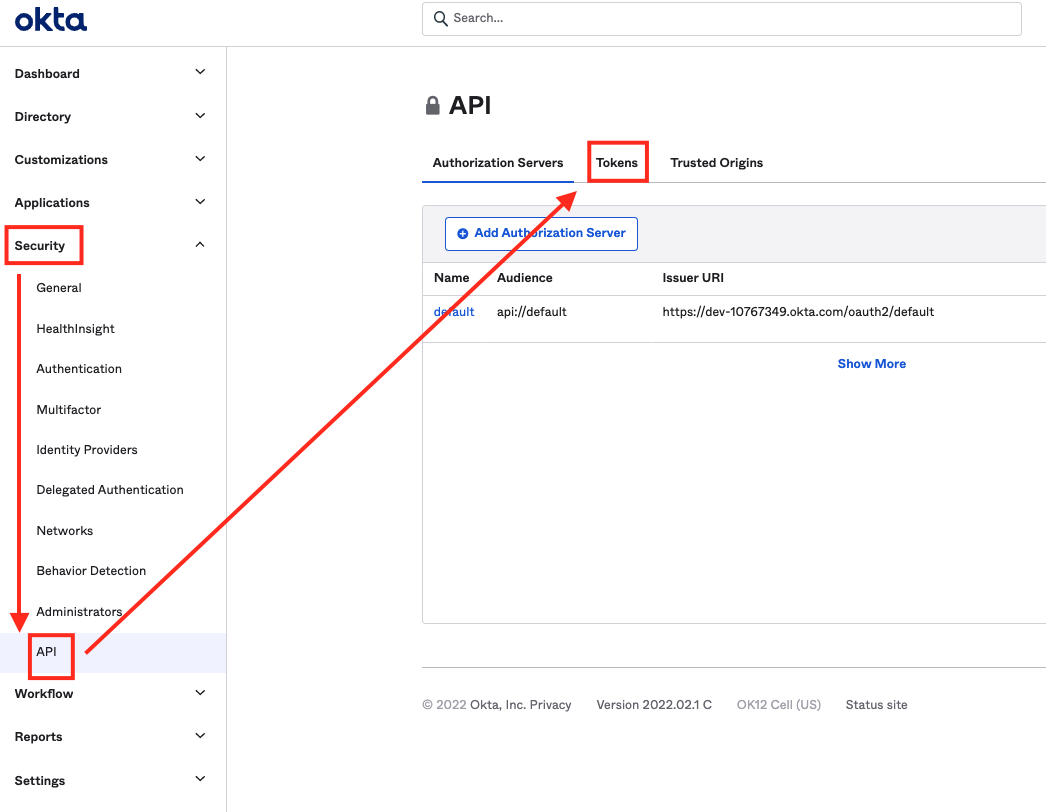
Create an API token
Log into Okta with the account you’ll use to generate the API token.
The account must have Super Administrator, the custom read-only role you created above, or a combination of Read Only/App Admin/Group Admin privileges. The permissions on the API token affects what features and functionality are available from ConductorOne. Before you begin, review the chart in API permissions and ConductorOne capabilities to make sure you’re creating a token with the right permissions for your needs.
Configure the Okta AWS Federation connector
- Cloud-hosted
- Self-hosted
Follow these instructions to use a built-in, no-code connector hosted by ConductorOne.That’s it! Your Okta AWS Federation connector is now pulling access data into ConductorOne.
Choose how to set up the new Okta AWS Federation connector:
- Add the connector to a currently unmanaged app (select from the list of apps that were discovered in your identity, SSO, or federation provider that aren’t yet managed with ConductorOne)
- Add the connector to a managed app (select from the list of existing managed apps)
- Create a new managed app
Set the owner for this connector. You can manage the connector yourself, or choose someone else from the list of ConductorOne users. Setting multiple owners is allowed.If you choose someone else, ConductorOne will notify the new connector owner by email that their help is needed to complete the setup process.
Enter your Okta domain (the URL of your Okta instance is
<YOUR DOMAIN>.okta.com) into the Okta domain field.Optional. If desired, click the checkbox to Allow group to direct assignment conversion for provisioning.When this setting is enabled, when AWS roles are requested directly and the user is assigned to the AWS app in Okta via group membership, ConductorOne will convert the user assignment to a direct assignment.
Finally, set an Okta connector as the source of identities for this connector. This significantly improves the connector’s performance. In the Shared identity source area of the page, click Edit.